

Sometimes even the most simple requests can balloon in extra configuration to meet the client’s vision.
One of the most common uses of a Power Apps portal is to collect some information using a form. Adding a form component to a portal page is a very simple exercise. You create the model-driven form in the Power Apps maker portal, and then in the Portal Studio create a page and add the form component (also known as an Entity Form) and point back to the model-driven form.
UPDATE MAY 2021
I discovered that this process does not render a multi-line content snippet. This is due to the fact that Liquid is rendered server-side and JavaScript runs client side. So the content snippet will add line breaks to the JavaScript code that will mess it up. When I figure a workaround I will post it here! In the meantime, this method is still valid if your have short, one liner, text based content snippets.

Rendering the form on the portal provides a way for users to enter data that will be saved to a Dataverse table.

A common request is ask users if they agree to certain terms and conditions, or if they have read the fine print, etc. So you may get the requirement to add some additional text to the portal page.
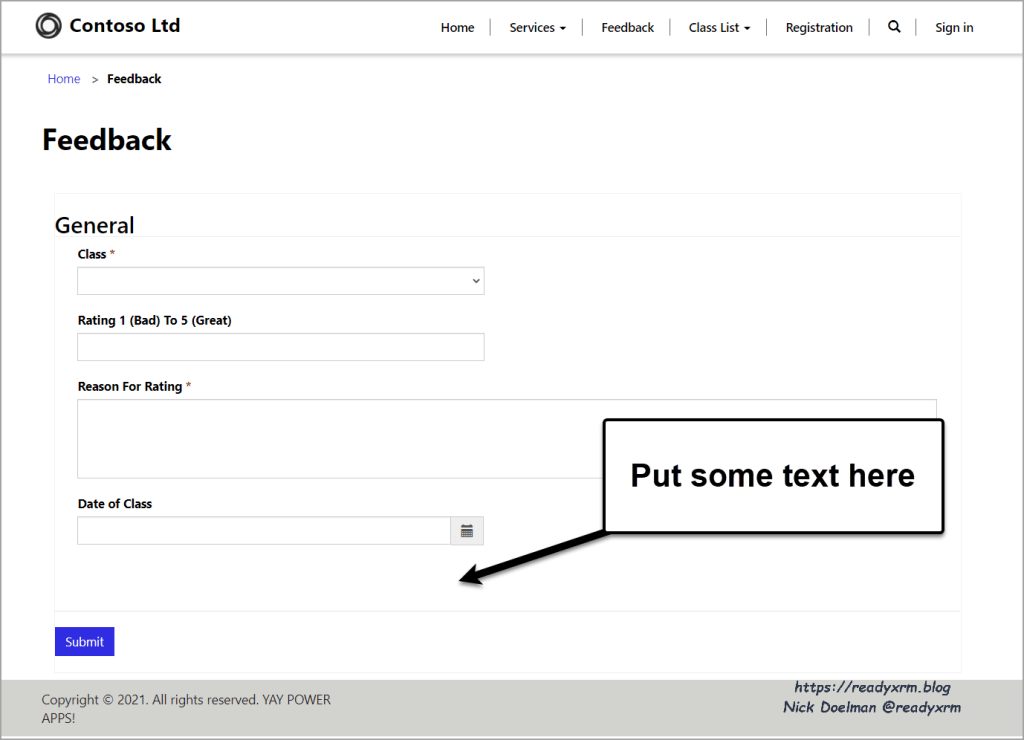
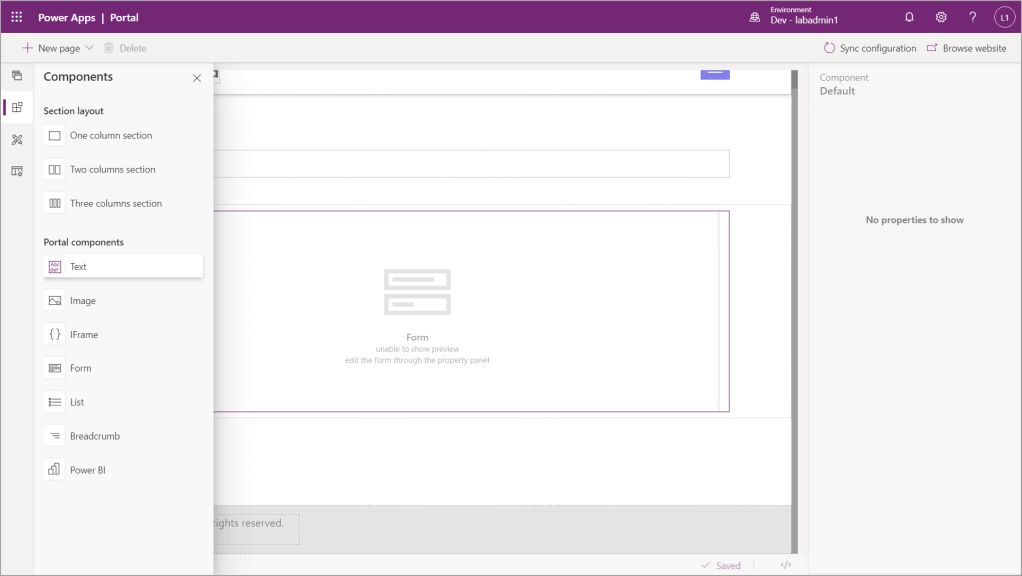
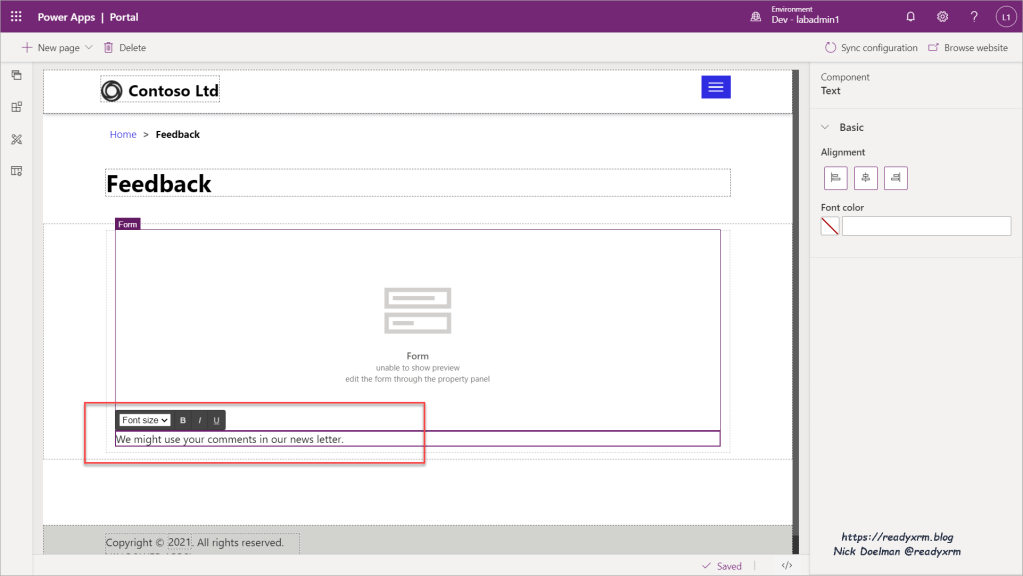
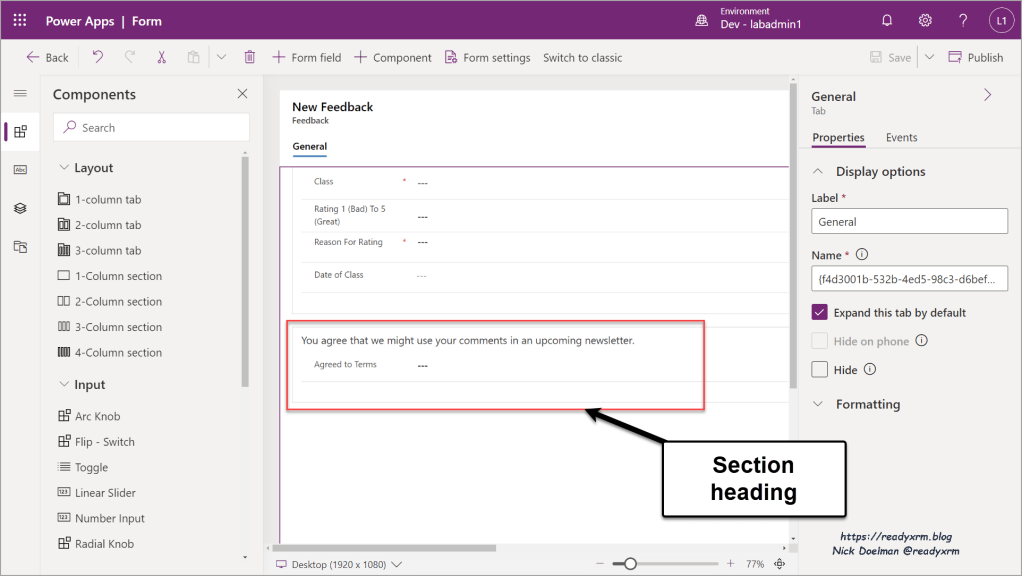
This is an easy task using the Portal Studio. Simply inject a text control on the same page as the form control.
Enter in the text you want displayed at the bottom of the form.
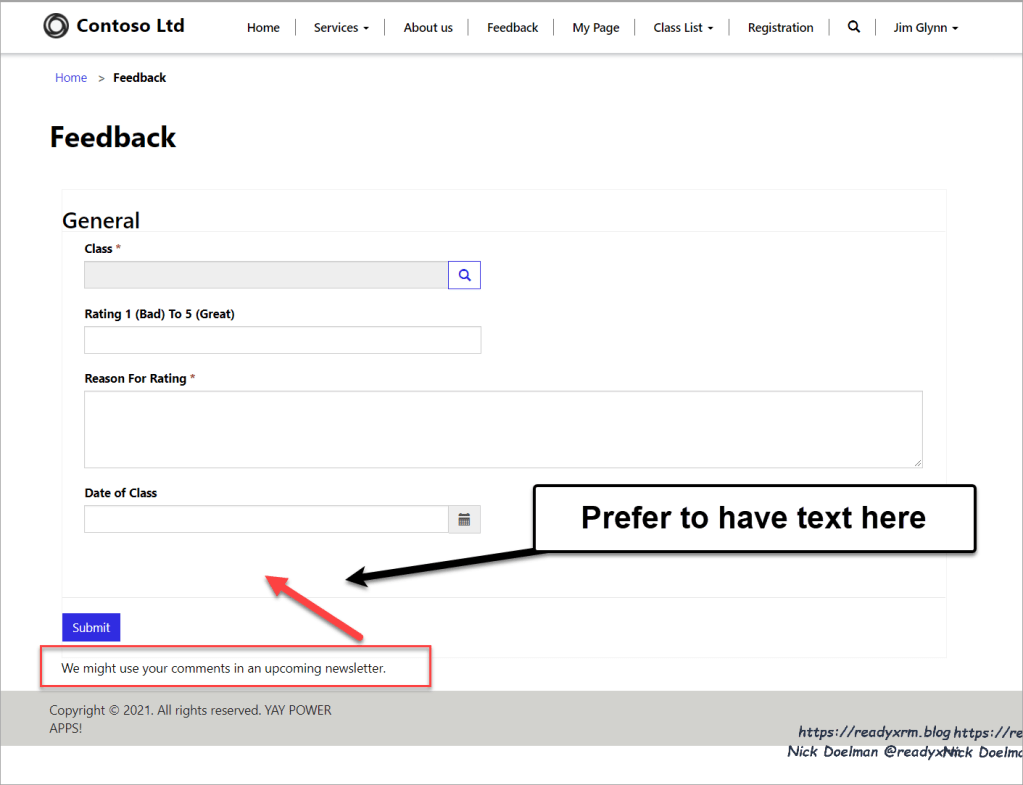
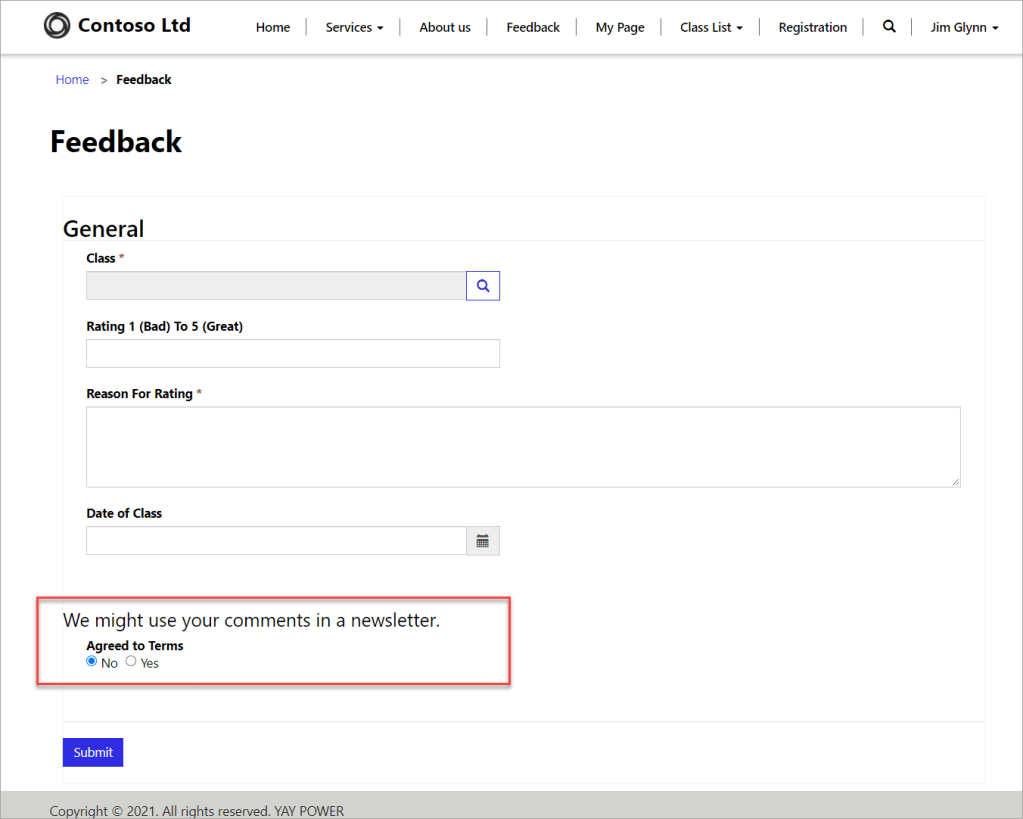
When published, the text appears, but it appears after the submit button. In many instances the request will be to have the terms and conditions appear before the submit button. Another common request is to have an acknowledgement that the terms were read and accepted.
Model-driven form to the rescue!
There is no out of the box way using the Portal Studio to add that content before the submit button (or anywhere else on the form). However, we can modify the model-driven form itself and put in the corresponding text. The form is modified using the Power Apps maker portal (NOT the Portal Studio)
Now we see our form has the text *before* the submit button. Notice that we added a field to make sure the user accepts whatever the text is suggesting. This works BUT…
What if the content is updated regularly? What if it is repeated in multiple places? Does this mean we need to modify the text on the form (ideally on a dev system) and then push the update via solution export/import or through an ALM process? This becomes a tedious and expensive process if that content changes often. Ideally, we would want to use a Content Snippet to hold the text and allow it to be update in one easy spot of the Portal Metadata.
Hack – Inject HTML in a model-driven form
I noticed (a bit by accident) that you can inject HTML code on model-driven forms.
The HTML will render on a Power Apps portal page!
So I replace the section label from the default text to the following HTML code:
<p id="terms"></p>This code basically setups a paragraph block with an id (I could have used a DIV here as well)

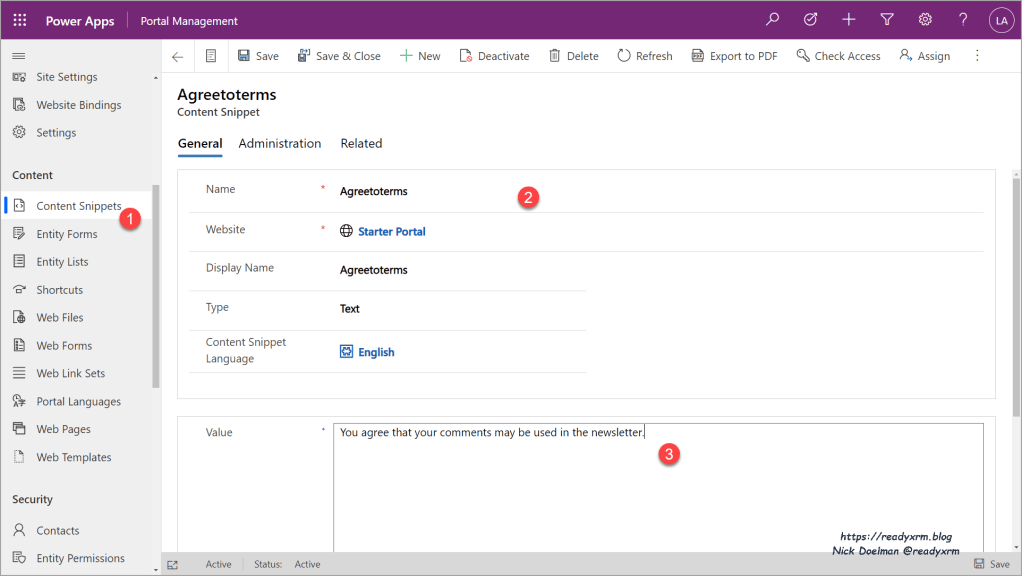
The next step is to create a content snippet record using the Portal Management app.
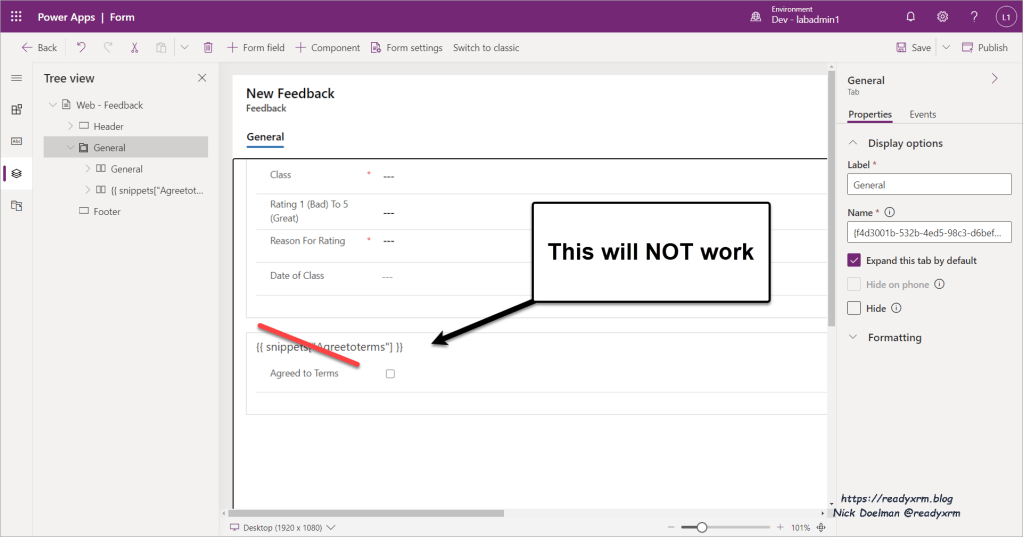
Now I know what you are thinking… if we can inject HTML into a model-driven form, can we inject a Liquid tag? Unfortunately, no, Liquid will NOT render if place in the label of a model-driven form (yes, I did try).
JavaScript!
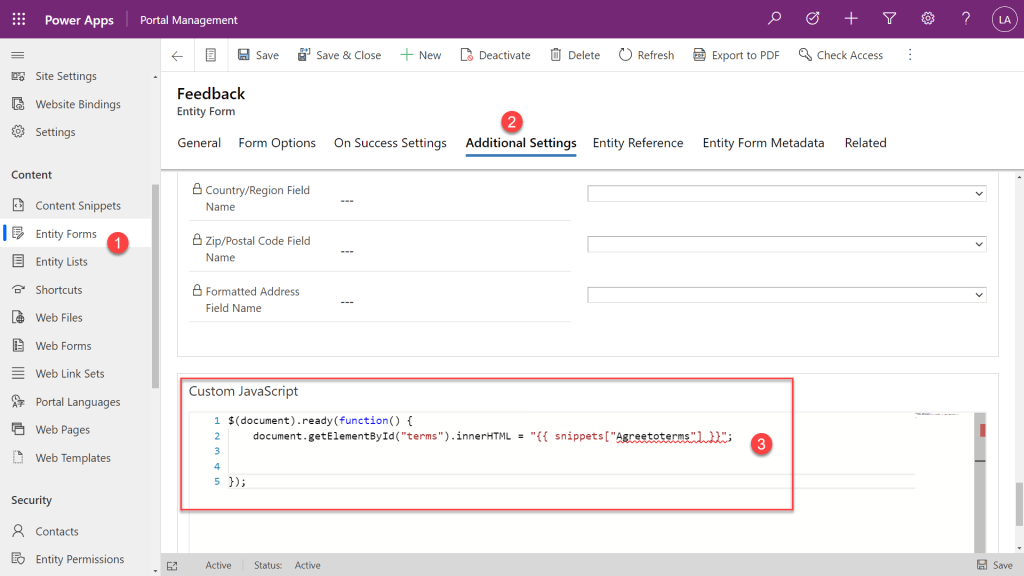
The next step is to add some JavaScript. In this example, I added the JavaScript directly to the Entity Form record, most you know I prefer to add JavaScript to a Web Template, but for now, the code will work here just as easily.
The code below simply takes the content snippet (via a Liquid tag) and places it in the paragraph HTML tags I added to the model-driven form.
While we are at it, how about adding some code that will hide and show the form submit button? In order for the JavaScript to fire correctly, we need to change the “Accept” radio button to a checkbox. For some reason, we can’t do this in the new model-driven form designer but rather the classic form editor.
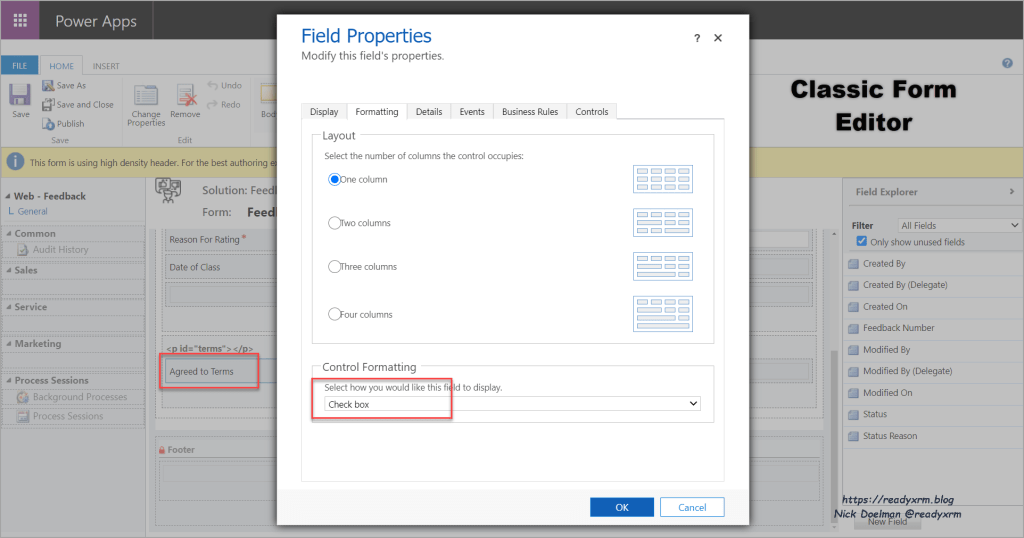
Now that our “Accept” field (column? ugh) is a checkbox, lets add some more JavaScript code to hide and show the submit button when it is checked or unchecked.
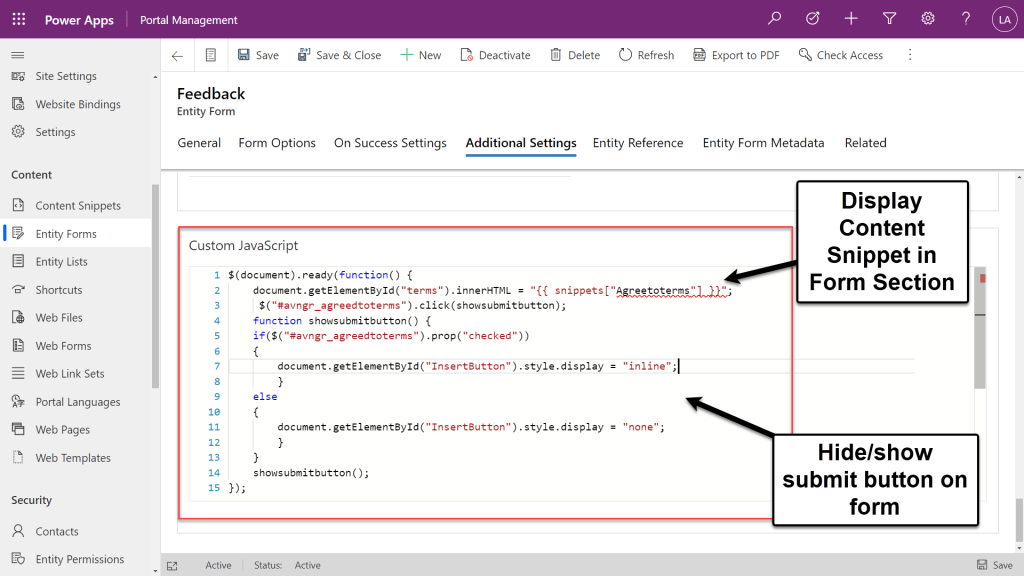
Below is the full code, we need the block to run only when the form has fully loaded (e.g. ready function). The first like places the content snippet text in the paragraph HTML tag on the model-driven form.
The showsubmitbutton function checks the “Agree” field on the form to see if it is checked or not, if it is, show the submit button, if its not, hide it.
There is a bit of info on Microsoft Docs regarding JavaScript on Power Apps portals.
$(document).ready(function() {
	document.getElementById("terms").innerHTML = "{{ snippets["Agreetoterms"] }}";
	$("#avngr_agreedtoterms").click(showsubmitbutton);
	function showsubmitbutton() {
	if($("#avngr_agreedtoterms").prop("checked"))
	{
		document.getElementById("InsertButton").style.display = "inline";
	}
	else
	{
		document.getElementById("InsertButton").style.display = "none";
	}
}
showsubmitbutton();
});
Testing the Feedback form
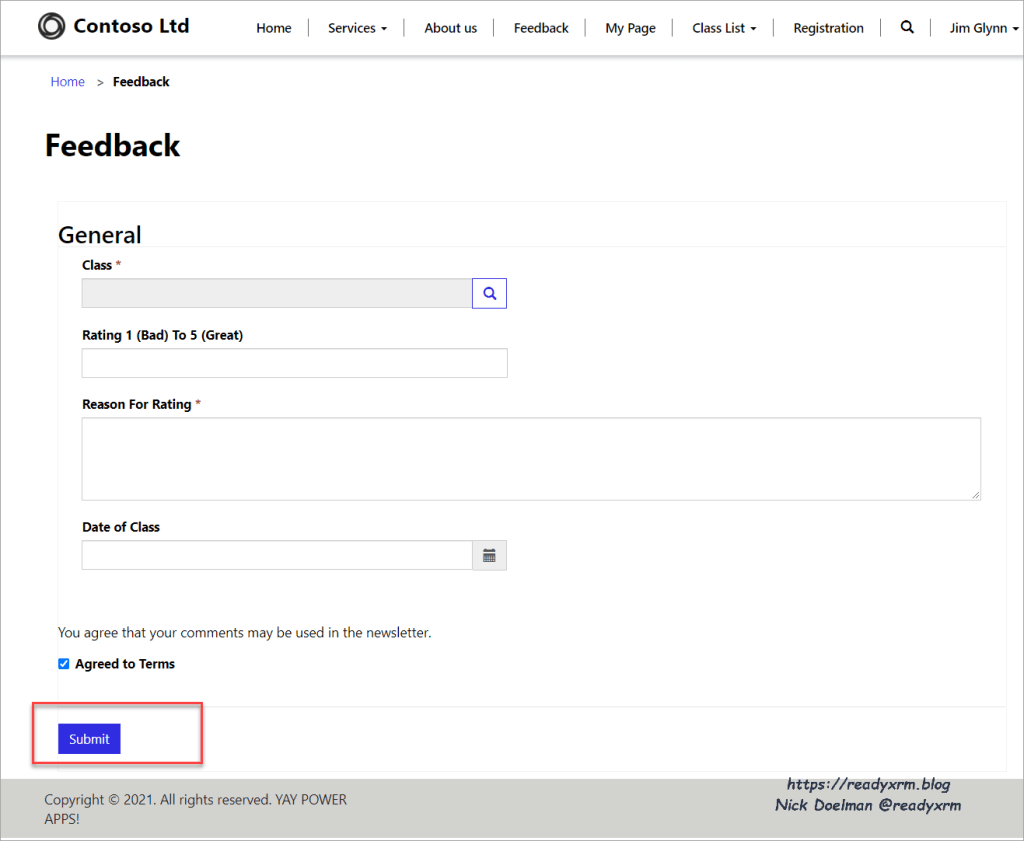
Now when we look at the form on the portal, we see the text from the content snippet. This is easily updated in the Portal Management app and there is no need to publish and update a solution.
If the “Agree” is unchecked, the submit button is not visible, and once the agree to terms is checked, the submit button appears and the form can be submitted.

Agreed to terms checked…
Summary
Sometimes simple requirements turn into complex requirements, but with a bit of imagination, they can be easily addressed using simple solutions.
Cover Photo by Diana Polekhina on Unsplash
Nick Doelman is trainer and content creator at 365.Training and is also a Microsoft MVP and MCT. Nick is speaking the Global Power Platform Bootcamp Global Stream on February 19 and also at Scottish Summit on February 27th. Follow Nick on Twitter @readyxrm


Thanks. This is great. I have been able to hide and components (buttons and text input and labels) but it seems not to be revealing them upon checking the check box.
Secondly, and more important to my situation, the Javascript code doesn’t seem to work on Webforms. I am trying to implement a button (or checkbox in this case) that when clicked, reveals a Text Input field. The Webform is required for the step-by-step (wizard-like) feature it offers. Any tip?
LikeLike
Could be an issue in your JavaScript. I would either add an alert(“hello”); statement at various parts of the code to see if is hitting or by pressing F12 in the browser to load developer tools to troubleshoot further.
LikeLiked by 1 person
Thanks. That was helpful. It seems the ready() method runs when using entity forms, but not when using web forms. I’ll have to look for the appropriate method to call.
LikeLike
His work has saved me countless hours! Wishing for a speedy recovery.
LikeLike