
The following post is a perfect example of a process that I don’t do very often and when I do, I keep forgetting how to do it. So today I am going to write it down so in the future, I can refer to this post. Maybe you will find it helpful as well.
In my case, it relates specifically to Power Apps Portals, but these steps would apply to any project where you need to convert an SSL certificate.
UPDATE: If you want to do this faster, and are comfortable with command-line tools, there is CRM Tip of the Day response to this post. Click here to view the Tip.
SSL Certificates in Power Apps Portals
When working specifically on Power Apps Portals projects, part of the process is to upload an SSL certificate in the Portal Admin Center in order to configure a custom URL.
This process is documented on the Microsoft Docs site.
You can get a SSL certificate from different providers. The provider I am currently using works well but they provide the SSL download as either a CER or P7B format only.
Power Apps Portals requires you upload the SSL certificate as a PFX file.
While there are some online tools available, I prefer to do this conversion on my own machine locally.
The steps shown are done on a Windows 10 machine. I don’t use a Mac because I am not a grandmother who got oversold at BestBuy or an arts student that hangs out at Starbucks. (Sorry Andrew Bibby)

Steps to Convert P7B to PFX
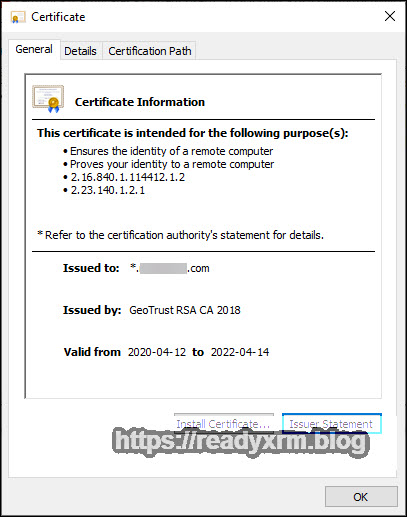
Once you download the P7B (or CER) file from you SSL provider, double-click on the certificate file and the Windows certmgr application will open.

Locate the certificate of your domain name and double-click to install the cert on your local machine. (This does not need to be the machine of your website or project). A window with details of the SSL will appear on your screen. Click to install the certificate.
Choose local machine and click Next.

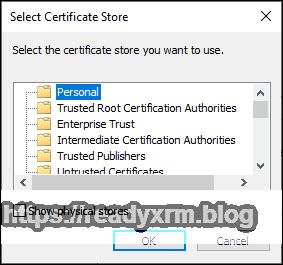
In the next screen, choose to place certificates in a particular store, click browse;
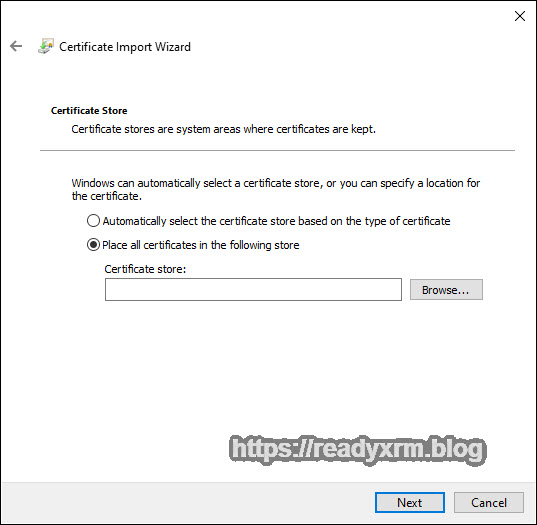
Make sure you choose “Personal” store.
Click Finish to complete the import process.
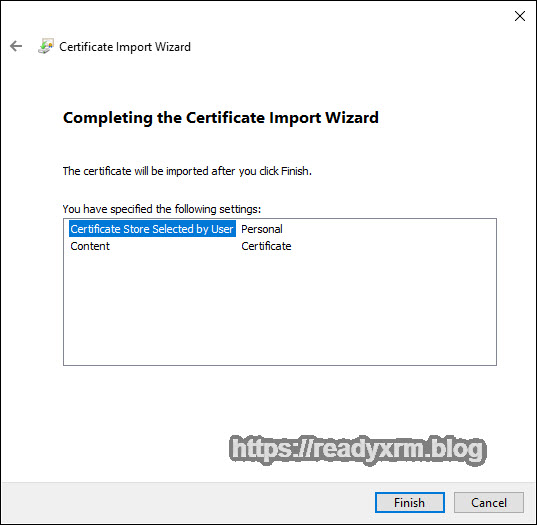
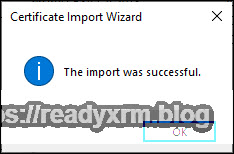
The process should show as successful.
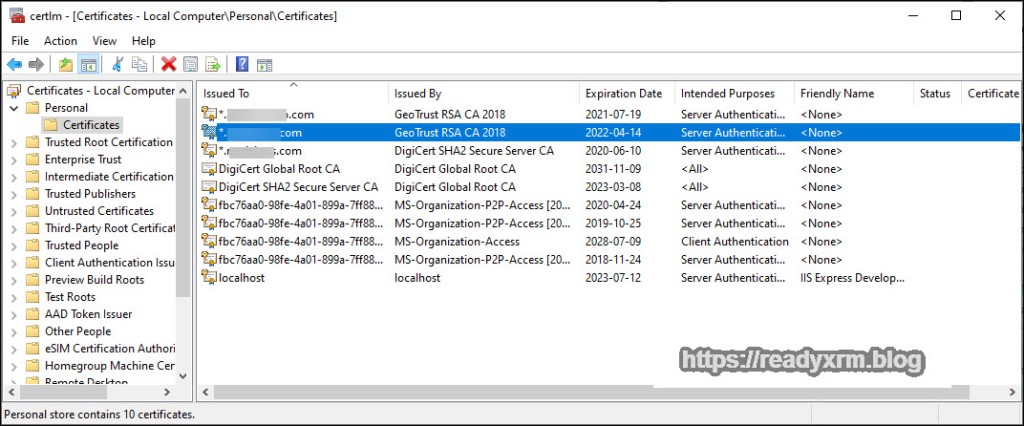
Next, from the Windows search box, type in “cert” and you should see a control panel option to Manage Computer Certificates. Click on that to launch the mmc.exe with the certificate option already enabled.
Navigate to the Personal Certificates folder and locate the certificate you installed earlier.
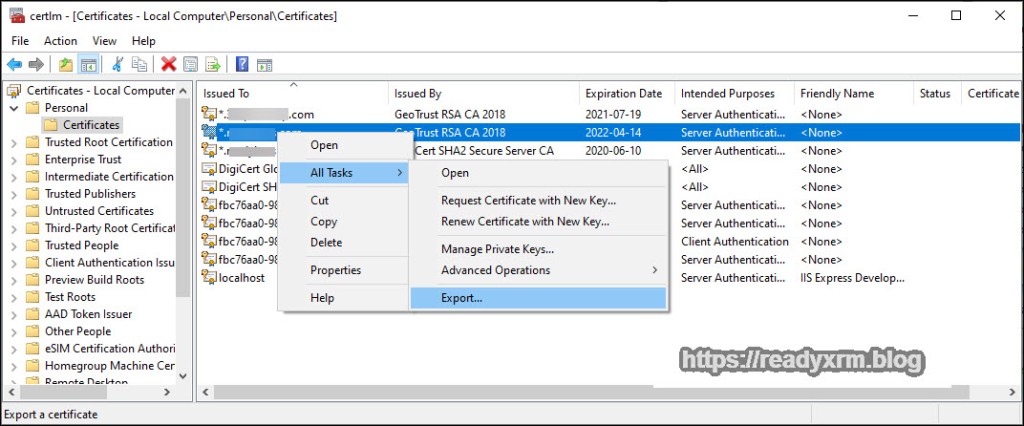
Right click on the certificate entry and choose All Tasks -> Export
The Certificate export wizard will start. Click Next

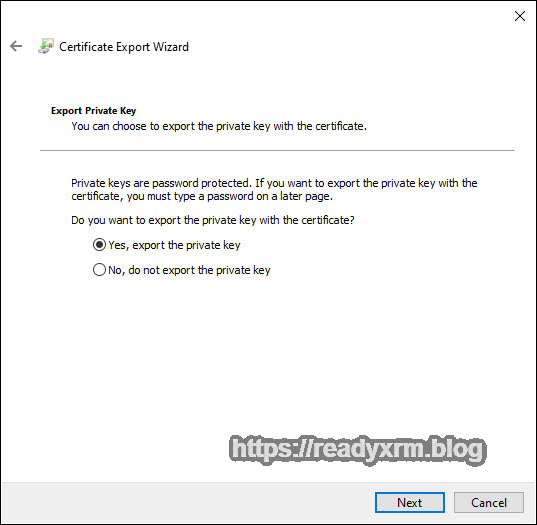
Make sure you choose to export the private key with the certificate.
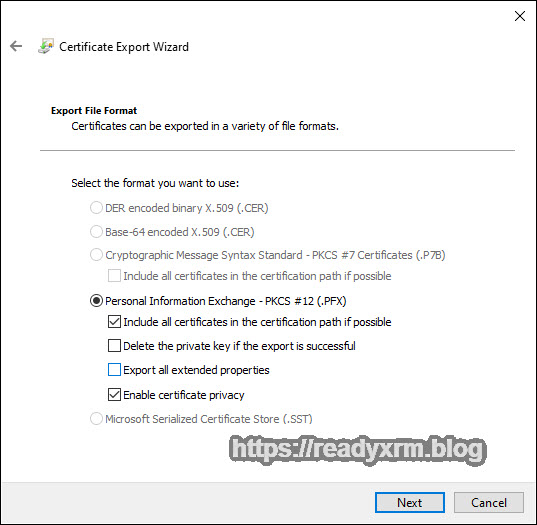
The next screen is where you can specify the type of SSL you want to export, which as PFX (required for Power Apps Portals) Click next.
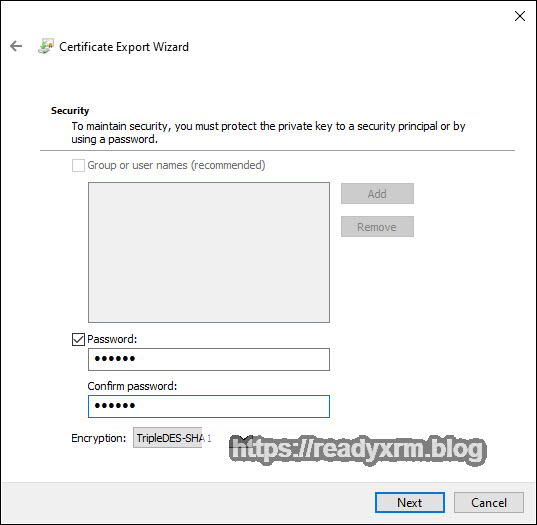
Enter a password that you can remember but no one else will guess. If you are doing this for installing on a Power Apps Portal you will need to enter this at that time.
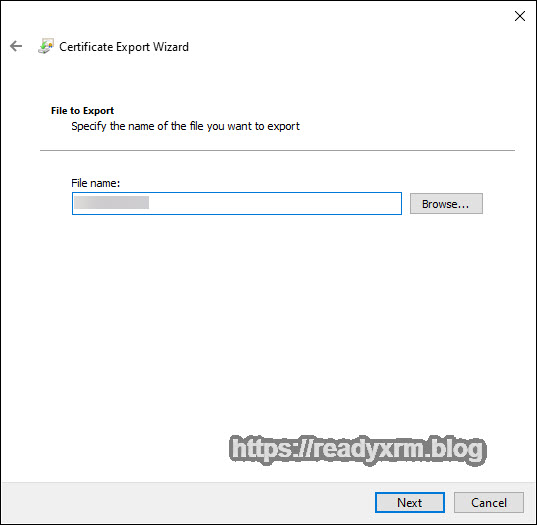
Specify a filename. This can be anything you want it to be.
The final step will complete the wizard and you will have a PFX SSL certificate file ready to upload to Power Apps Portals or whatever your project may be.

Summary
This was a fairly simple blog post, but I know I have had to go down some Google rabbit holes to figure this out in the past and I know a few others who have sometimes struggled a bit with this as well. This not typically something I do everyday. I hope you find it helpful (I am talking to you, future me)
Cover Photo by Robert Anasch on Unsplash
Mac at Starbucks Photo by Aral Tasher on Unsplash
Nick Doelman is a Microsoft Business Applications MVP specializing in training and consulting services for the Power Platform and related technologies. Nick uses a Windows machine because he needs to do real work like an adult. Follow Nick on twitter at @readyxrm


P7B files do not contain private keys. You can tell what certificates have a private key attached to them in certmgr and certlm by the key icon that appears in the top left corner of the certificate icon. Certificate providers give you a p7b file and a PEM file. The PEM file is where the private key is.
To accomplish the task in this article you need to convert the p7b file to crt files using the below command. The below commands will not work in the usual WIndows Certificate DER format. This requires the certificates to be exported/installed/saved in Base64 format.
“`cmd
openssl pkcs7 -print_certs -in certificate.p7b -out certificate.crt
“`
This extracts all the containing certificates in the p7b file, the Root and Intermediate CA chain certificates as well as the main certificate. Usually I end up copy and pasting the different certificates into different files after doing this. Only after extracting the certs from the p7b file can you combine the certificates with the private key. This can be done with the below command.
“`cmd
openssl pkcs12 -export -out certificate.pfx -inkey privateKey.key -in certificate.crt -certfile rootintermediatechaincerts.crt
“`
You can now install the PFX file which will install the private key into your certificate store. Only after doing this are you able to export the PFX file in the second part of the post. If anyone knows how to do this with certutil please post it. I only know how to do this with openssl which is not a native windows tool. Hope this helps
LikeLike
Thanks! My buddy George already gave me grief for posting wrong info, thanks for the details, hopefully someone can answer the question regarding certutil. Cheers, Nick
LikeLike