

Summary
- All PowerApps/Dynamics 365/CDS projects, big or small should be using some form of source control for customization.
- You don’t necessarily need to build complicated build pipelines or continuous integrations to implement an ALM process.
- This post provides instructions on installing tools and setting up some PowerShell scripts to automate some tedious chores when managing Dynamics 365/CDS solutions.
- UPDATE: Alternatively you can use Azure DevOps Power Apps Build Tasks, I have a companion post on that technique, click here.
Introduction
From Wikipedia
Application lifecycle management (ALM) is the product lifecycle management (governance, development, and maintenance) of computer programs. It encompasses requirements management, software architecture, computer programming, software testing, software maintenance, change management, continuous integration, project management, and release management.
There are a lot of tools and systems available for implementing ALM/DevOps processes for Dynamics 365/Power Platform projects. However, many of these tools are geared towards massive, multi-developer deployments with rigorous development, testing, deployment processes. Microsoft has recently released a preview of its PowerApps Build Tools and many DevOps practitioners use the Dynamics 365 Build Tools provided by MVP Wael Hamze.
Many PowerApps projects (including Dynamics 365 implementations) are actually small projects that may have only a few (or even one) implementers or developers involved. Implementing a full DevOps Pipeline process for these types of projects would be like digging carrots with a backhoe.

However, even with the smallest of projects, having a solid source control process is critical to protect both an implementer and a client from expensive issues such as system downtime to recovering lost source code.
Here are some key questions that you should consider:
- Do you backup each version of your Dynamics 365/CDS Solution files somewhere?
- Do you have a copy of both the managed and unmanaged versions of your solutions?
- Do you know which copy was actually deployed to your system?
- Do you rely on a restore of a backup of your production environment every time you need a new sandbox environment?
If any of those questions cause some level of anxiety, you may need to re-consider your ALM strategy.
Setting Up a Simple ALM Process for Small PowerApps/Dynamics 365 Projects
NOTE: The following code/solutions are provided “as is” and I take no responsibility for your usage. I would suggest testing this out on a trial instance and keep away from children and pets.
The following is a quick and simple ALM process that I put together in a few hours. It is well suited for those PowerApps/Dynamics 365 configurators/makers who are working by themselves or on small teams on a particular project.
This is a work in progress and there already a bunch of other things that I would like to eventually add to the processes (e.g. running solution checker, portal metadata, etc).
Essentially it is a couple of PowerShell scripts that do the following:
- Automatically export solutions from an Dynamics 365/CDS environment.
- Unpack the solutions
- Save the solutions to a source control system (Azure DevOps)
- Automatically import (and publish) the solutions to a destination system
These scripts has saved me hours of time exporting and importing solutions as well as has given me a peace of mind that I have a solid backup of all my Dynamics 365/CDS customization and configurations. I have all the required pieces to quickly rebuild a development or sandbox environment.
The following steps will require Git, Azure DevOps and PowerShell. Don’t be intimidated by the command line stuff. This will take a few steps to setup.
Step 1 – Get Git
I use Git as my source control tool. Git is best described directly from its home web page, https://git-scm.com/
Git is a free and open source distributed version control system designed to handle everything from small to very large projects with speed and efficiency.
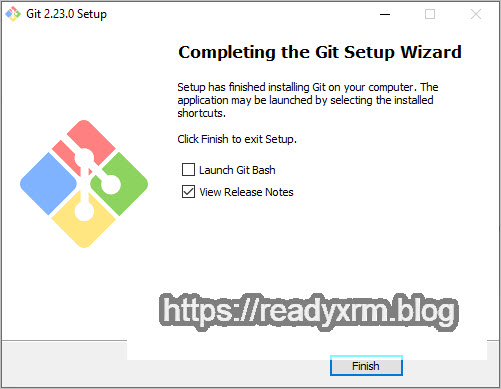
The first step is to download and install the Windows version. You can pretty much stick with the default settings as we will access Git using Windows Powershell.
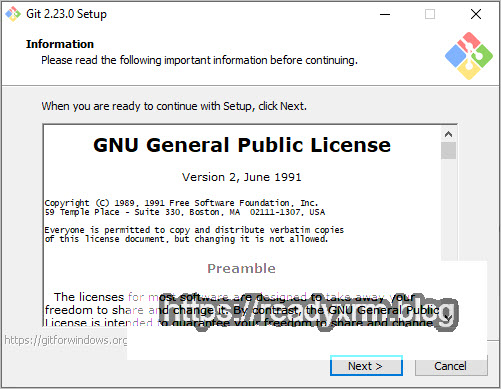
The Git installation process will ask a lot of questions during the installation process. You can continue to accept the defaults or make adjustments based on your own requirements and experience.
Step 2 – Setup a Source Control Repository in Azure DevOps
For my example, I will be using Azure DevOps for source control. You can also using different providers (Like GitHub) if you wish.
If you have a small number of configurators/developers, AzureDevOps is a great free option for source control.
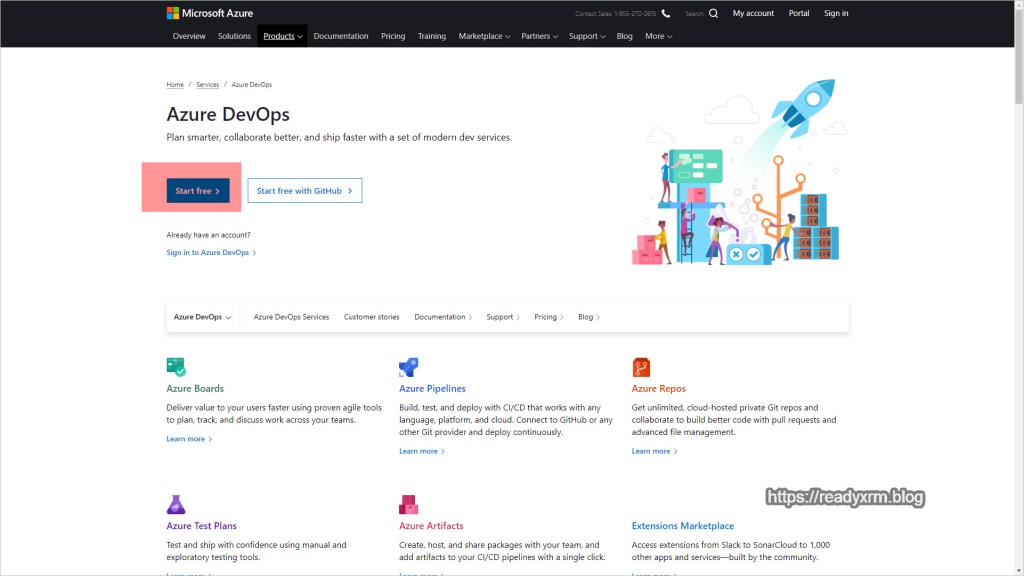
To get a free Azure DevOps account, navigate to http://www.visualstudio.com and select Get Started for free option

There are a number of very cool features with Azure DevOps. For now, we will be using the Azure Repros, but you should definitely explore some of the other features of Azure DevOps. Click Start Free.
You will need to sign in using a Microsoft account.

Give your project a descriptive name. This is where your customization files will be stored. You likely will want to keep your project private (unless you are building a community solution)

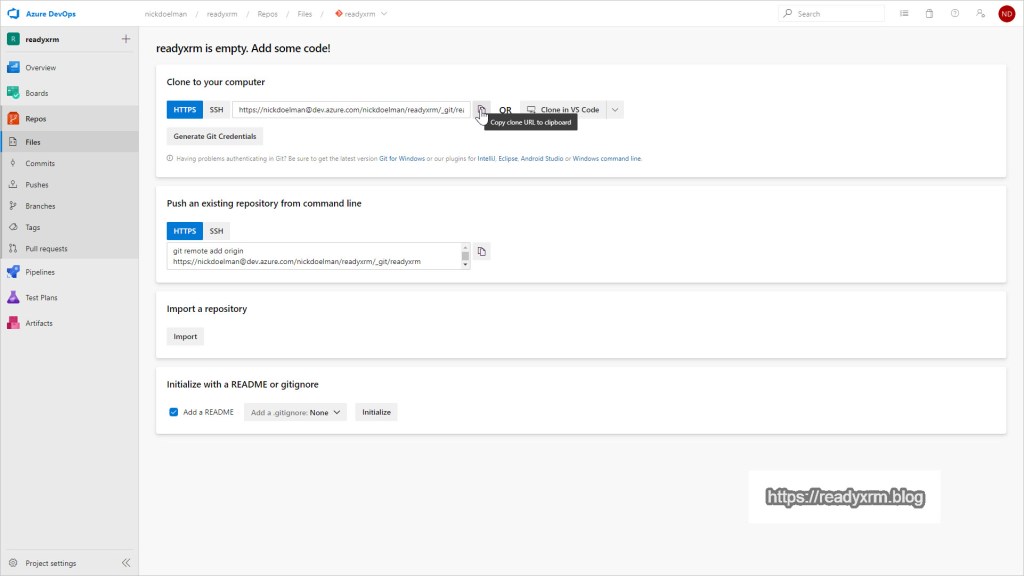
You will land on your project page in your new Azure DevOps.

We now want to clone our repository (Azure DevOps Repro) to our local machine. This is where we will dump our solution files and use Git to sync them up to the Azure DevOps server to act as our source control.
Navigate to the the Repros section and copy the HTTPS link under the “clone to your computer” section.
Step 3 – Clone the Repository on Your Local Machine
The next step is to clone the GIT repository on your local machine. For this we will use Windows PowerShell. This should be already available on your Windows 10 machine. If you are not used to command-line tools, then maybe ask someone over 40 to help you out. 🙂
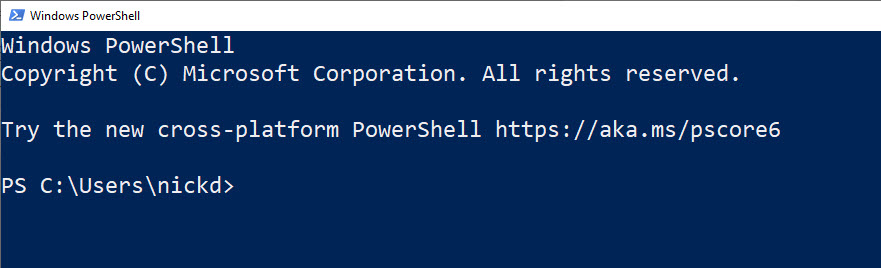
Launch Windows PowerShell. This will automatically provide a prompt in your user directory.
The next step is that we will create a directory (and old fashioned name for a file folder) and clone our repository.
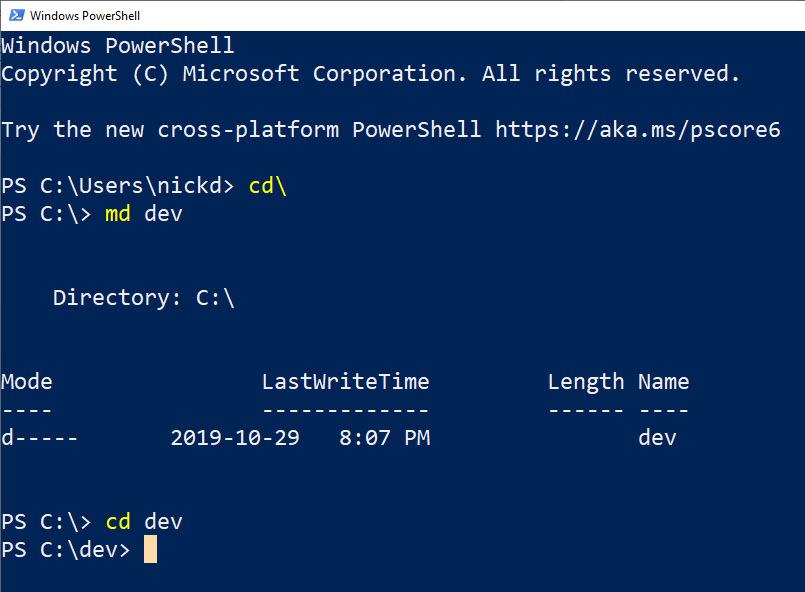
First, navigate to the root of the C:\ drive and type in the follow and hit the Enter key (the “cd” command is “change directory” and the “\” indicates the root).
cd \Then create a new directory called “dev” (or whatever you want) The “md” command is “make directory”:
md devFinally, navigate to the new directory you created.
cd devThe following screen shot shows the commands. See? You are almost a PowerShell expert.
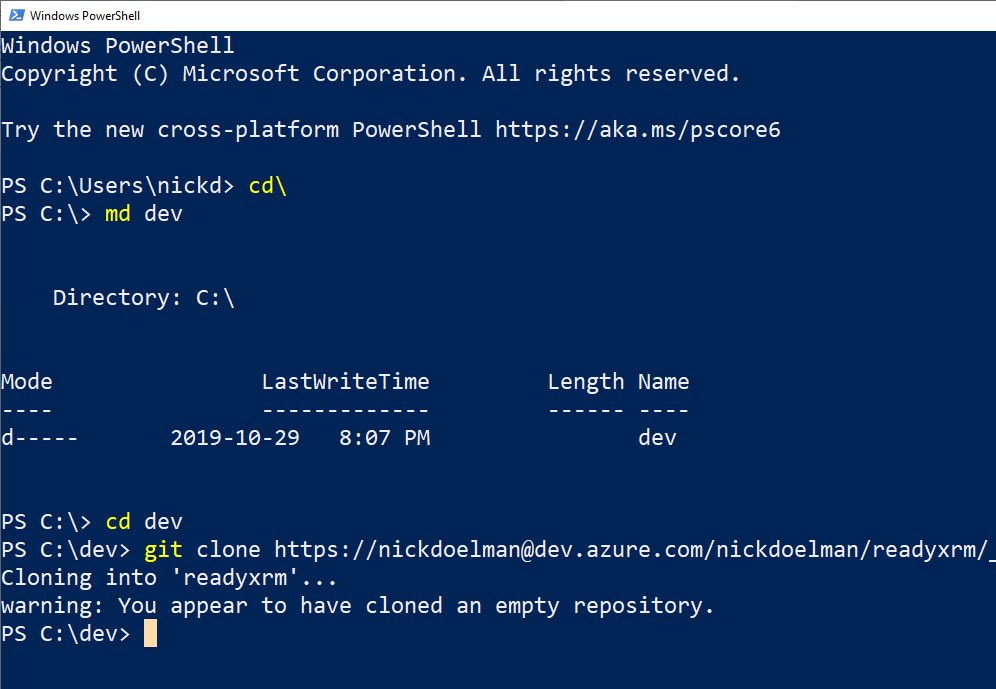
Now we will clone the repository. Since we have already installed GIT on our machine, the GIT commands are available in PowerShell.
Type “git clone” and then past the URL link you copied earlier from Azure DevOps.
git clone https://<<repository from Azure DevOps>>This will create a clone of the repository on your local machine. Note that there is nothing yet stored in the repository. You also may get prompted for your Azure DevOps login.
Step 4 – Add Tools to your Workstation
We now need to load a series of tools from Microsoft and the community in order to automate a lot of the tasks that we would normally do manually such as exporting and importing solutions.
Microsoft.Xrm.Data.PowerShell
The first set of tools comes courtesy of Sean McNellis. Sean has created a series of PowerShell commandlets for managing Dynamics 365 (and by default, CDS environments).
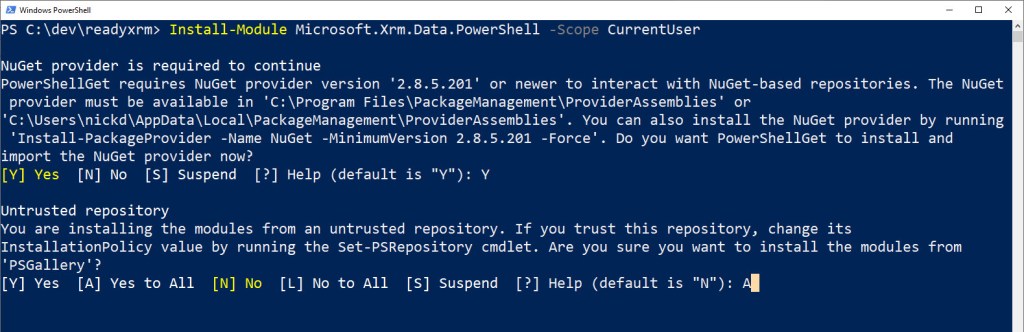
Most PowerShell modules can be easily installed from the PowerShell Gallery from the command line. To install Sean’s PowerShell commandlets, type in the following (in PowerShell) and press enter:
Install-Module Microsoft.Xrm.Data.PowerShell -Scope CurrentUserYou will get a message to install NuGet, which is another tool for loading developer type tools on your workstation. Choose “Y” to allow the process to install NuGet.
You will also get a message about an Untrusted repository. These PowerShell commandlets are legit. Press “A” to continue the installation.
Sean’s tools provide commandlets for importing and exporting solutions and updating data in CDS databases. However, we also want to unpack our solutions before adding to source control.
Adoxio.Dynamics.DevOps
To do this, another community contributor; Alan Mervitz has created some additional PowerShell commandlets to enhance ALM processes for Dynamics 365 (and CDS).
Type in the following to install Alan’s tools from the PowerShell Gallery:
Install-Module -Name Adoxio.Dynamics.DevOps -Scope CurrentUserYou will again get the message about untrusted repositories. Choose “A” to continue the process.

Power Platform/Dynamics 365 Developer Tools (aka CRM SDK)
The last set of tools we need is the CRM SDK. These are not PowerShell commandlets but rather a set of tools such as the Solution Packager and Data Migration Tool.
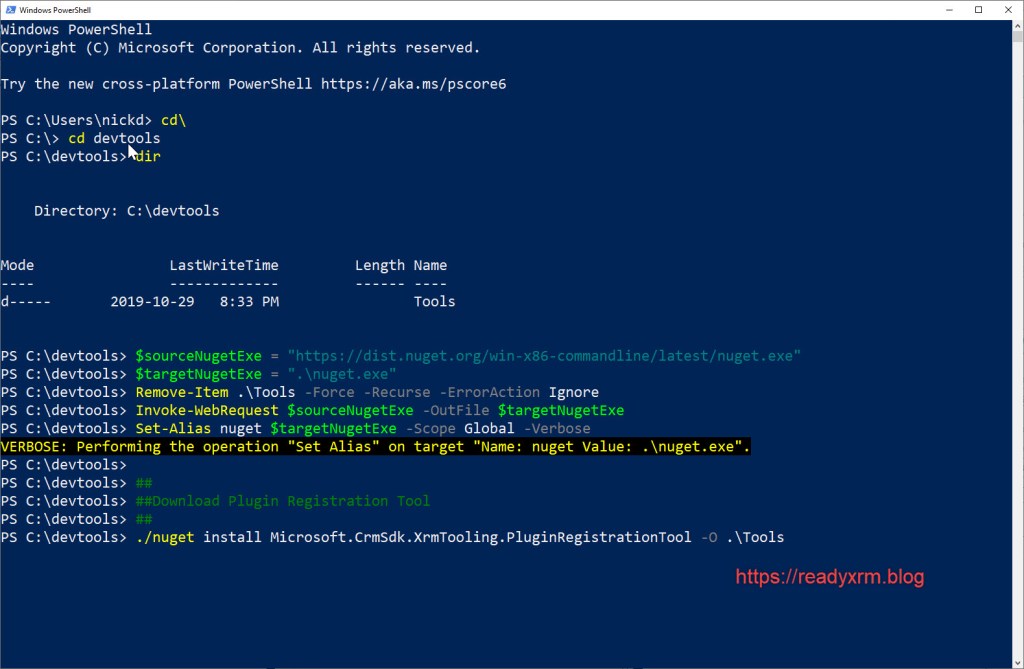
For this we want to create a new directory. Type in the following commands to create the directory specifically for the CRM SDK
cd \
md devtools
cd devtools
There are a number of different ways to install the CRM SDK. Since we will have PowerShell already open, the easiest way would be to run the PowerShell Commands to install the CRM SDK.
Open a browser and navigate the the Microsoft Docs site that has the PowerShell script to download the files.
Simply copy the PowerShell commands from the web page:
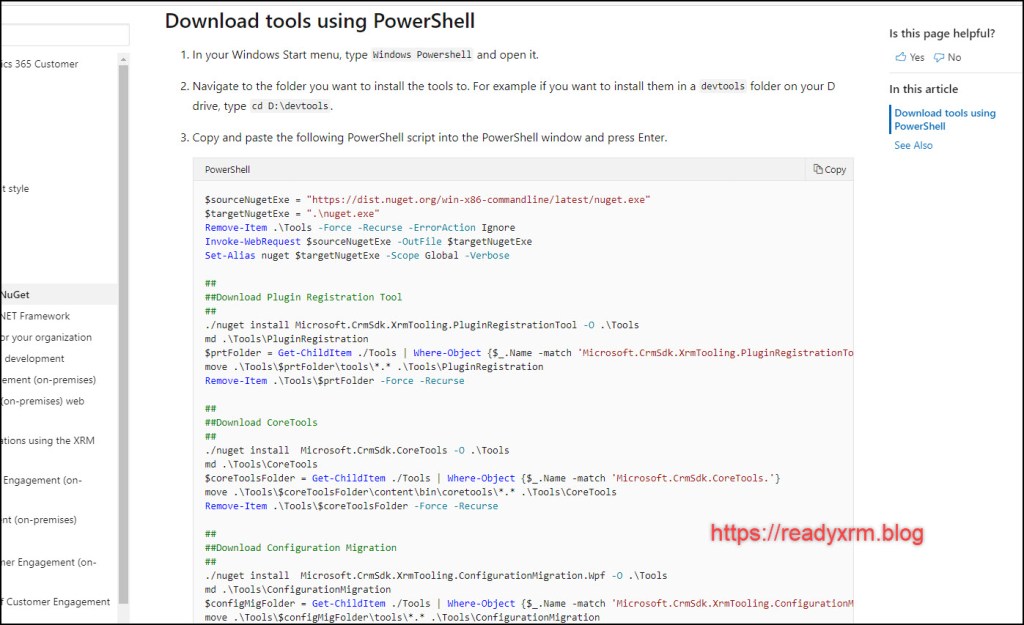
In PowerShell (assuming you are still in the new devtools directory) simply paste the commands you copied from the step above. The process will download and install the tools.
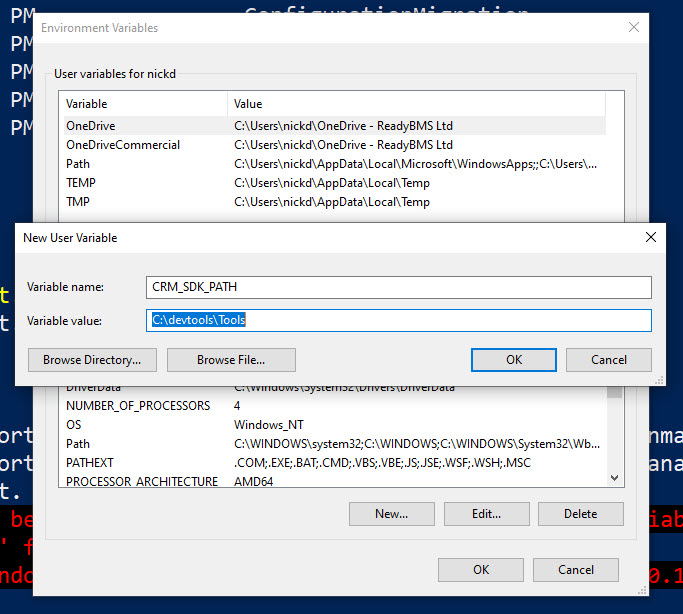
Once the tools are downloaded we will need to add an environment path variable so our PowerShell script will know where to locate the various tools.
From the Windows start menu, type in “enviro” in the search box and you see a link to “Edit the System Environment Variables”. An app will open, click on the Environment Variables button and then to System variables, add the following;
- Variable name: CRM_SDK_PATH
- Variable value: (browse to the directory where you installed the tools, likely C:\devtools\Tools)
Step 5 – Build a PowerShell Script to Export, UnPack and Push CDS/Dynamics 365 Solutions to Source Control
Now that all the tools have been installed on your workstation, you can now build a PowerShell script that automate a lot of the manual tasks when it comes to solutions.
I have provided my copies of the PowerShell scripts here. You will need to fill in the details such as your login information and the URLs to your development instances.
These scripts can also be found on GitHub.
The script will do the following steps;
- Accept a solution name as a parameter (or prompt you for one)
- Connect to your Dynamics 365/CDS Instance
- Export your solution, both as Managed and UnManaged (I am NOT going to get into that debate here. Whatever your preference, you are getting both solutions)
- Unpack the unmanaged solution (See “Why unpack?” below)
- Add, Commit and Push the Solution to source control (Azure DevOps) using Git commands.
Copy the following and save it your C:\dev\<<project>> directory as “crmexport.ps1”
# Fill in Details so you won't need to enter them every time
param (
[Parameter(Mandatory=$True)][ValidateNotNull()][string]$solutionShortName,
[string]$username = "you@somewhere.com",
[string]$password = "password",
[string]$exportLocation = "C:\DEV\readyxrm",
[string]$instance = "https://<<orgname>>.crm3.dynamics.com/",
[string]$region = "CAN",
[string]$type = "Office365",
[string]$organisation = "<<orgname>>"
)
# Make sure we have modules imported
Import-Module Microsoft.Xrm.Data.Powershell
# Get Credentials
$securePassword = ConvertTo-SecureString $password -AsPlainText -Force
$credentials = New-Object System.Management.Automation.PSCredential ($username, $securePassword)
# Connect to PowerApps/Dynamics 365
$CRMConn = Get-CrmConnection -Credential $credentials -DeploymentRegion $region –OnlineType $type –OrganizationName $organisation
# Export both Managed and UnManaged Solutions
Write-Host "Exporting Solution, please wait."
Export-CrmSolution $solutionShortName $exportLocation -SolutionZipFileName $solutionShortName"_Unmanaged.zip" -conn $CRMConn
Export-CrmSolution $solutionShortName $exportLocation -SolutionZipFileName $solutionShortName"_Managed.zip" -Managed -conn $CRMConn
# Unpack Solution
Write-Host "Expanding Solution, please wait."
Expand-CrmSolution -ZipFile $solutionShortName"_Unmanaged.zip" -PackageType Unmanaged -Folder $solutionShortName
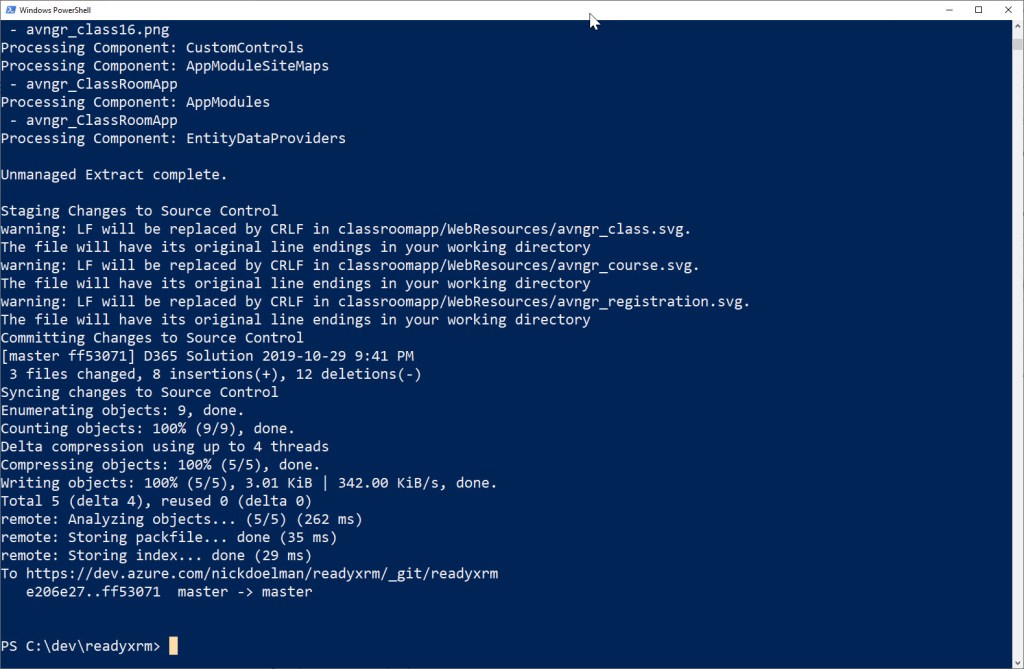
# Add to Local Repository
Write-Host "Staging Changes to Source Control"
git add -A
# Commit Changes to Local Repository
Write-Host "Committing Changes to Source Control"
# Get today's date
$today = Get-Date -Format g
# Commit with today's date & message
git commit -m "D365 Solution $($today)"
# Push to AzureDevOps
Write-Host "Syncing changes to Source Control"
git pushStep 6 – Build a PowerShell Script to Import CDS/Dynamics 365 Solutions
The following script will do the opposite, import the solution (managed) into your destination environment (Test, Prod, etc). If you insist, you can modify the script to import unmanaged solutions as well.
The script will perform the following tasks;
- Take the solution name as a parameter (assuming it was exported and still exists in the local repository)
- Connect to your destination Dynamics 365/CDS instance.
- Import the solution, if you import the unmanaged, it will publish as well.
Copy the following and save it as “CRMImport.ps1” in the C:\dev\<<project>> directory.
# Parameters so you don't need to re-enter each time, note case is important here.  Fill in username, password and orgnames

param (
    [Parameter(Mandatory=$True)][ValidateNotNull()][string]$solutionShortName,
    [string]$username = "you@somewhere.com",
    [string]$password = "password",
    [string]$solutionPath = "C:\dev\readyxrm",
    [string]$instance = "https://<<orgname>>.crm3.dynamics.com",
    [string]$region = "CAN",
    [string]$type = "Office365",
    [string]$organisation = "<<orgname>>"
    )

Import-Module Microsoft.Xrm.Data.Powershell

#get credentials and make connect to instance
$securePassword = ConvertTo-SecureString $password -AsPlainText -Force
$credentials = New-Object System.Management.Automation.PSCredential ($username, $securePassword)

$CRMConn = Get-CrmConnection –ServerUrl $instance -Credential $credentials -OrganizationName $organisation -MaxCrmConnectionTimeOutMinutes 5

Set-CrmConnectionTimeout -TimeoutInSeconds 3600 -conn $CRMConn

#import managed solution
Write-Host "Importing Solution, please wait."

Write-Host "$($solutionPath)\$($solutionShortName)_Managed.zip"

Import-CrmSolution -SolutionFilePath "$($solutionPath)\$($solutionShortName)_Managed.zip" -conn $CRMConn

# Unmanaged version, you can uncomment and comment out managed import
#Import-CrmSolution -SolutionFilePath "$($solutionPath)\$($solutionShortName)_Unmanaged.zip" -conn $CRMConn -PublishChanges
You will need to create a new Azure DevOps project, repository and a set of scripts for each unique project you work on.
Step 7 – Run the PowerShell Scripts
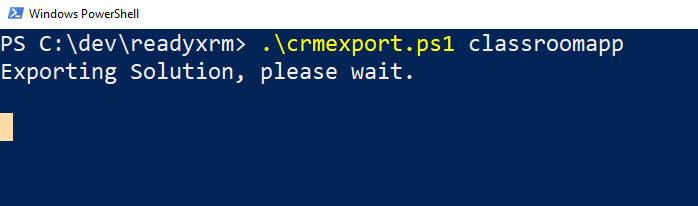
Here is what you should see if everything is setup correctly, run the following from the project directory in PowerShell;
C:\Dev\ProjectName\.\crmexport.ps1Note you will need to type “.\” proceeding the script (PowerShell thing).
Exporting a solution called “classroomapp”;
The following is an example of running the import script, the solution imports.
C:\Dev\ProjectName\.\crmimport.ps1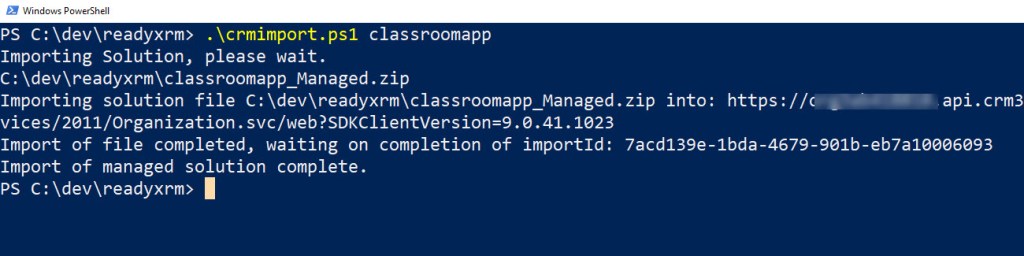
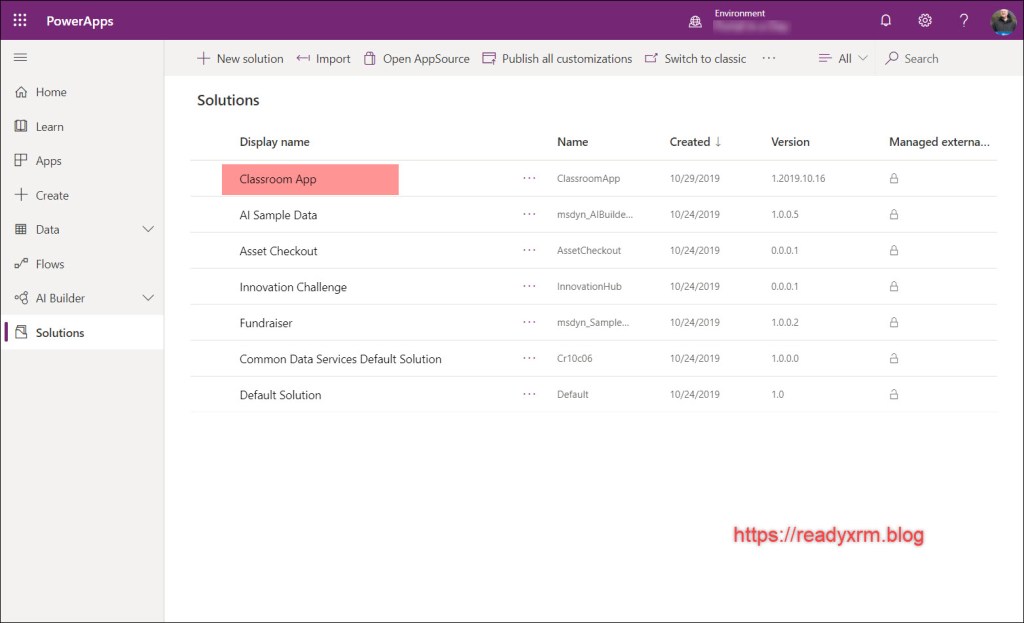
The solution now appears in the destination environment and all files (unmanaged, managed and unpacked solutions) will be in Azure DevOps repository as sourced controlled files.
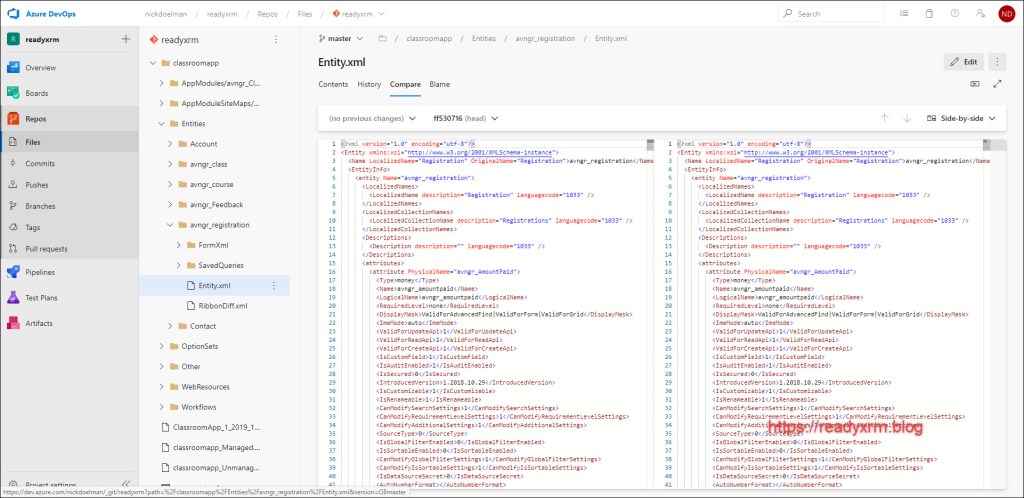
Why Unpack?
The crmexport script will call the solution packager tool and unzip all the assets in the solution. They are a number of uses for the Solution Packager tool. By unpacking the files and saving to source control, you will be able to compare different versions of your code and be able to quickly identify potential changes or issues (and assign blame).
Conclusion
I realize there were a lot of steps to setup these scripts, and you will need to re-create a new directory and update scripts for each project. However, once in place, a very quick and simple command line replaces a lot of clicking, navigation and file copying and provides a set of simple ALM steps.
There are more features that I would like to add to these scripts (invoking PowerApps checker, for example) and as your projects grow, then it may make sense to investigate the PowerApps build tasks or Wael Hamze’s Dynamics 365 DevOps tools (links above).
I am hoping that these tools offer an alternative and allow folks working on smaller projects to have a more robust ALM process and easy to use and reliable source control.
Backhoe Photo by qinghill on Unsplash
Cover Photo by Kelly Sikkema on Unsplash
Nick Doelman is a Microsoft Business Applications MVP and recently was awarded the Dynamic Communities All-Star Award. Follow Nick on Twitter at @readyxrm for news and updates on the Power Platform, PowerApps and Dynamics 365.


In step 5, did you mean to save the script as crmexport rather than crmimport?
LikeLike
YES! Thanks for noticing that! I went ahead and fixed it.
LikeLike
Great post Nick! This is something I can grasp, and something I could do in every project that isn’t large:)
PS: is this something that in the future could be made into a XrmToolBox app?
LikeLike
Hi Thomas, I am glad you enjoyed it. I agree, that would be a pretty cool XrmToolBox plug-in.
LikeLike
How many beers would it take to have Mr Rapp look at that. Hmmm 😂
LikeLiked by 1 person
Great post Nick! I would love to share it across. Thanks for sharing 🙂
LikeLike
Thank you! I am glad you enjoyed it!
LikeLike
Hi Nick,
I’m looking forward to putting this to use. Thanks for sharing it!
One question, do you use patches in your solutions for small modifications or do you just update and transfer the whole solution in your ALM? If you use patches is there anything that needs to be done differently in this ALM process?
Thanks,
Scott
LikeLike
Hi Scott, I try to keep my solutions small, so I am not using patches (yet). I am not sure if there is a PowerShell command to clone solutions (there should be) but the scripts I wrote should export and import the patch solutions the same as regular full solutions. I believe there are parameters on the import solution process to either stage for upgrade or apply patch. If you end up modifying the scripts to include some functions for patches, please share! Cheers, Nick
LikeLike
Reblogged this on Power of Power Platform and commented:
Setting Up a Simple ALM Process for Small PowerApps/Dynamics 365 Projects
LikeLike
In the script parameters, what are the options for Region and Type?
Where can we learn more about those?
Great Stuff. Thanks!
LikeLike
I hope this helps;
For Type:
AuthType/AuthenticationType: Authentication type to use to connect with Dynamics 365 Customer Engagement (on-premises) or Common Data Service. Default – value is AD. Valid values are: AD, Live, IFD, Claims, Office365, and OAuth.
Region:
Geographic region of your Common Data Service environment. Valid values are NorthAmerica, EMEA, APAC, SouthAmerica, Oceania, JPN, CAN, IND, and NorthAmerica2.
Source: [https://docs.microsoft.com/en-us/powershell/module/microsoft.xrm.tooling.crmconnector.powershell/get-crmconnection?view=pa-ps-latest]
LikeLike
Great post, you’ve made it easy, even for a non-developer! Thanks!
LikeLike
I am glad you liked it! We are all developers, but might use different tools.
LikeLike
Hej Nick,
nice article. I do wonder one thing though: Which advantage do you see by doing this locally via scripts opposite to running everything in Azure DevOps with pipelines?
LikeLike
That’s a great question. I started using variation of these scripts before the Power Apps build tasks were released. I had looked at an earlier version of Wael Hamze’s tools, and found there are excellent, but were geared toward larger projects and I found it was a lot of work to get setup for small, single developer projects. So I created these scripts and have been using them ever since. That being said, both toolsets have evolved to be much more accessible. Overall, whether its these PS tools or Azure DevOps, there are a lot of folks (including partners) that don’t use any kind of automation (believe it or not, still downloading solutions, copying, and uploading manually). Everyone should have some kind of ALM strategy. My scripts are a fairly simple entry point. For my own projects, I have started to use Azure DevOps pipelines, even for small projects.
LikeLiked by 1 person
Nice article. One question: do any of the powershell commands rely on dotnet framework? Reason I’m asking is if only dotnet core is required, it would be possible to run this in a dotnet core docker linux container, which would make it more easy and fast to automate in a ci/cd pipeline. Else we’d require dotnet framework windows containers, which are slower and much bigger.
LikeLike
At this time the various tools have dependencies on the dotnet framework. Microsoft has just started to refactor its various libraries using dotnet core but this still very much in alpha: https://github.com/microsoft/PowerPlatform-CdsServiceClient I have recently posted an updated version of this post using Azure Dev Ops pipelines, which will take care of spinning up environments to handle the tasks; https://readyxrm.blog/2020/04/07/simple-alm-for-power-apps-dynamics-365-projects-revisited-power-apps-build-tools-edition/ I hope that helps!
LikeLike