This is post is essentially a re-write of a post I wrote 2 years ago called Creating a Drill Down Link on a Dynamics 365 Portal Entity Form”.
However, with the upcoming release of PowerApps Portals I thought it might be a good time to re-visit some of the older Dynamics 365 Portals posts and revamp them for the new PowerApps Portals, as it is based on the same technology.
The private preview is wrapping up and the public preview is set to launch in a few weeks. My example screen shots show some legacy methods for configuration, newer methods (e.g. adding entity lists and entity forms to web pages) will be available in a few weeks.
Class List Portal App
My example is using a Starter PowerApp Portal pointed to a CDS only database with no 1st party Dynamics 365 Apps installed.
In this new example I created a very simple PowerApps Portals app to extend a model-driven Classroom management application.
I have a page that displays a list of upcoming classes. I placed an Entity List control on my web page that displays the list of class records from the CDS database.

I have configured the Entity List to drill down on the details of the class. So far, all fairly straight forward features of PowerApps Portals.
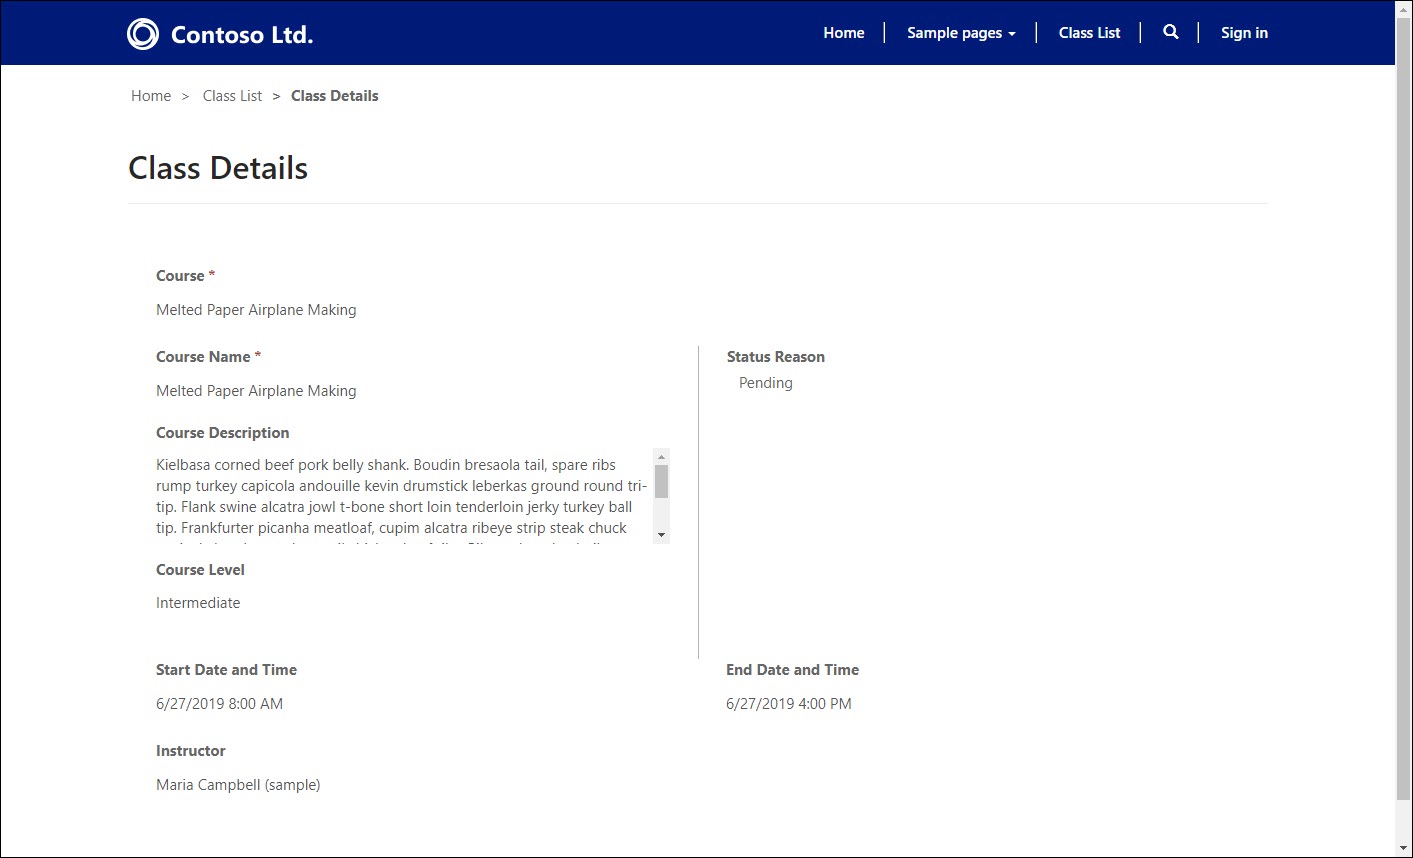
If I want to view “related” information (parent record info). Then the easy way is to embed a “Quick View” form on my model driven main form used as the basis for the Entity Form on the web page.

This works great for many situations. However, if I wanted to be able to drill down further, the entity form configuration becomes limited as compared to the model driven counterpart.
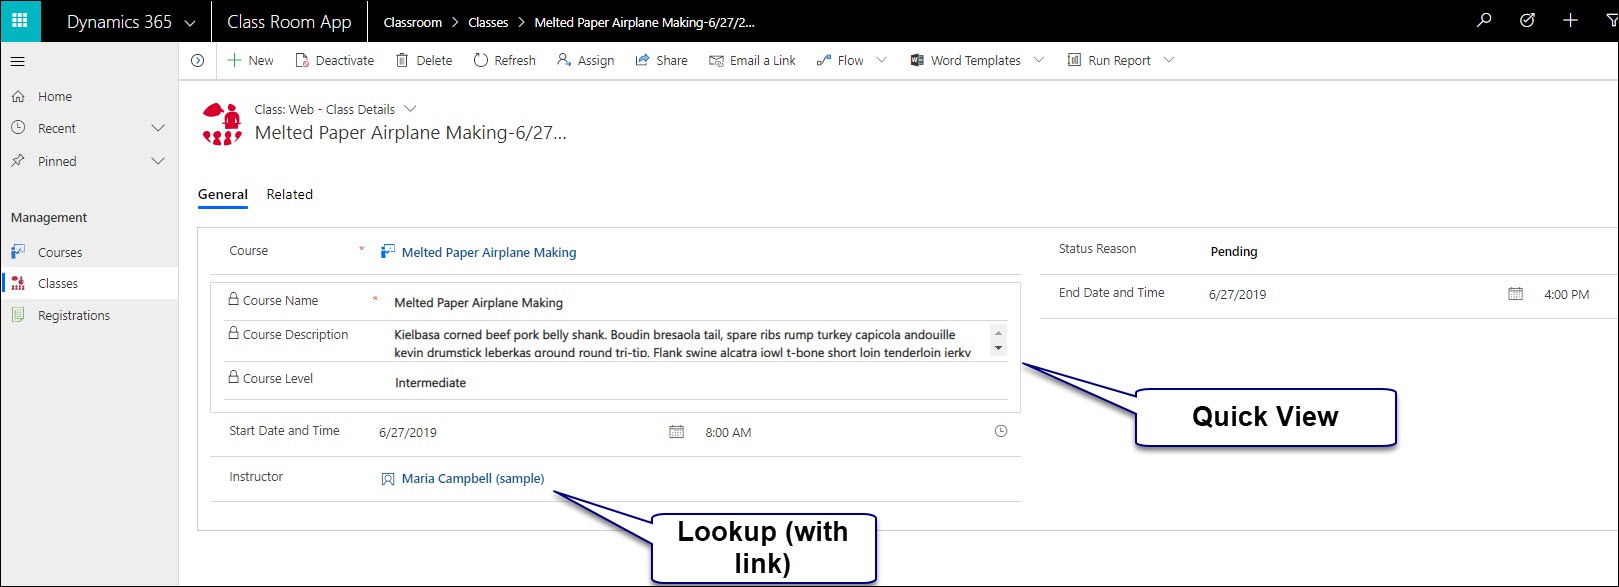
For example, on a Model-Driven PowerApp, I can click on the Instructor link and navigate to the Instructor record. I am NOT able to do that on the model driven form rendered on the Portal.

However, using a touch of Liquid, we can add drilldown capability to our existing web pages.
Note about Liquid
If you plan on doing anything with PowerApps Portals, you will need to get familiar with Liquid markup language.
The first thing would be to create a model-driven form specifically for the portal for our instructor, or use an existing contact form. We might want to limit the type of information.

We would also create a corresponding Entity Form record in the Portal Management App (at time of this publishing, the ability to create Entity Forms as part of the PowerApps Portals Studio was not yet released)

We would also create a web page and put the Instructor Entity form on this page. (Again, I used legacy front side editing tools, but soon we will be able to add components in the PowerApps maker experience site)

Once the web page was created, I created a corresponding Site Marker record (in the Portal Management App) so I would not need to hardcode the location of the web page in the next step.

I then created a copy of the “Full Page” web template and added Liquid code. I will use this template on the “Class” entity form page in order to add the custom drilldown to the instructor. I could have also added the Liquid code to the web page content however I prefer to keep all the Liquid, JavaScript and CSS code in one spot.
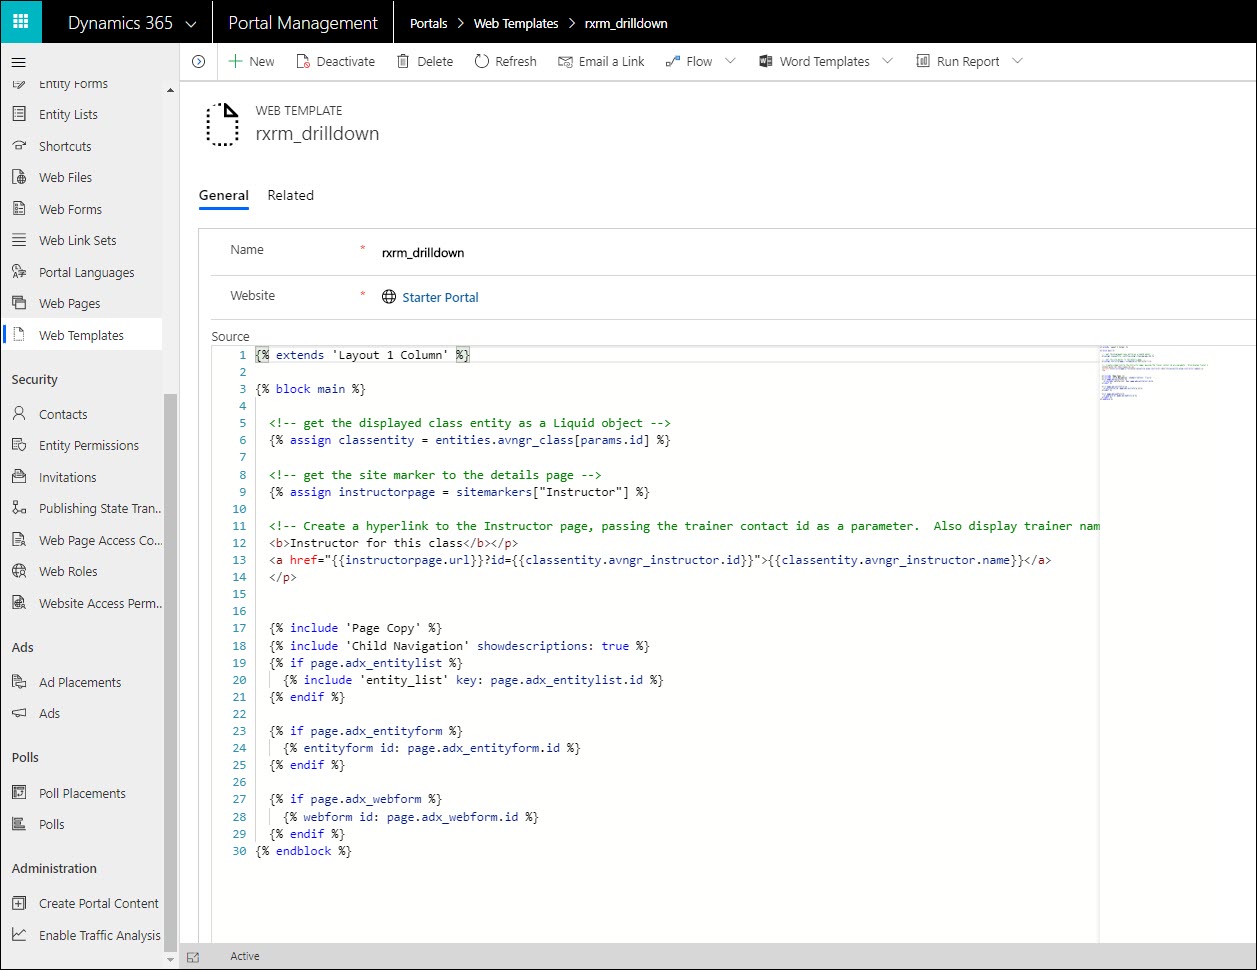
The code itself is fairly simple, the first line assigns the current Class record to an object based on the GUID that was passed as a parameter.
The second line simply assigns the Instructor site marker to an object.
The last line will take the site marker (instructor page) and pass the GUID of the instructor record as a parameter to the entity form. The name of instructor will also appear in the link.
  <!-- get the displayed class entity as a Liquid object -->
  {% assign classentity = entities.avngr_class[params.id] %}

  <!-- get the site marker to the details page -->
  {% assign instructorpage = sitemarkers["Instructor"] %}

  <!-- Create a hyperlink to the Instructor page, passing the trainer contact id as a parameter.  Also display trainer name -->
  <b>Instructor for this class</b></p>
  <a href="{{instructorpage.url}}?id={{classentity.avngr_instructor.id}}">{{classentity.avngr_instructor.name}}</a>
  </p>
Following the legacy method, you will need to create a corresponding Page Template for the new Web Template, and then assign this Page Template to your web page.
You will also need to configure Entity Permissions for the Class and Contact entities to ensure your portal users can view the data from CDS.
When the updated editor is released, you may be able to update the Liquid code directly from the PowerApps Portals maker studio.
The end result is that the page should appear with a dedicated link to the correspond Instructor record;
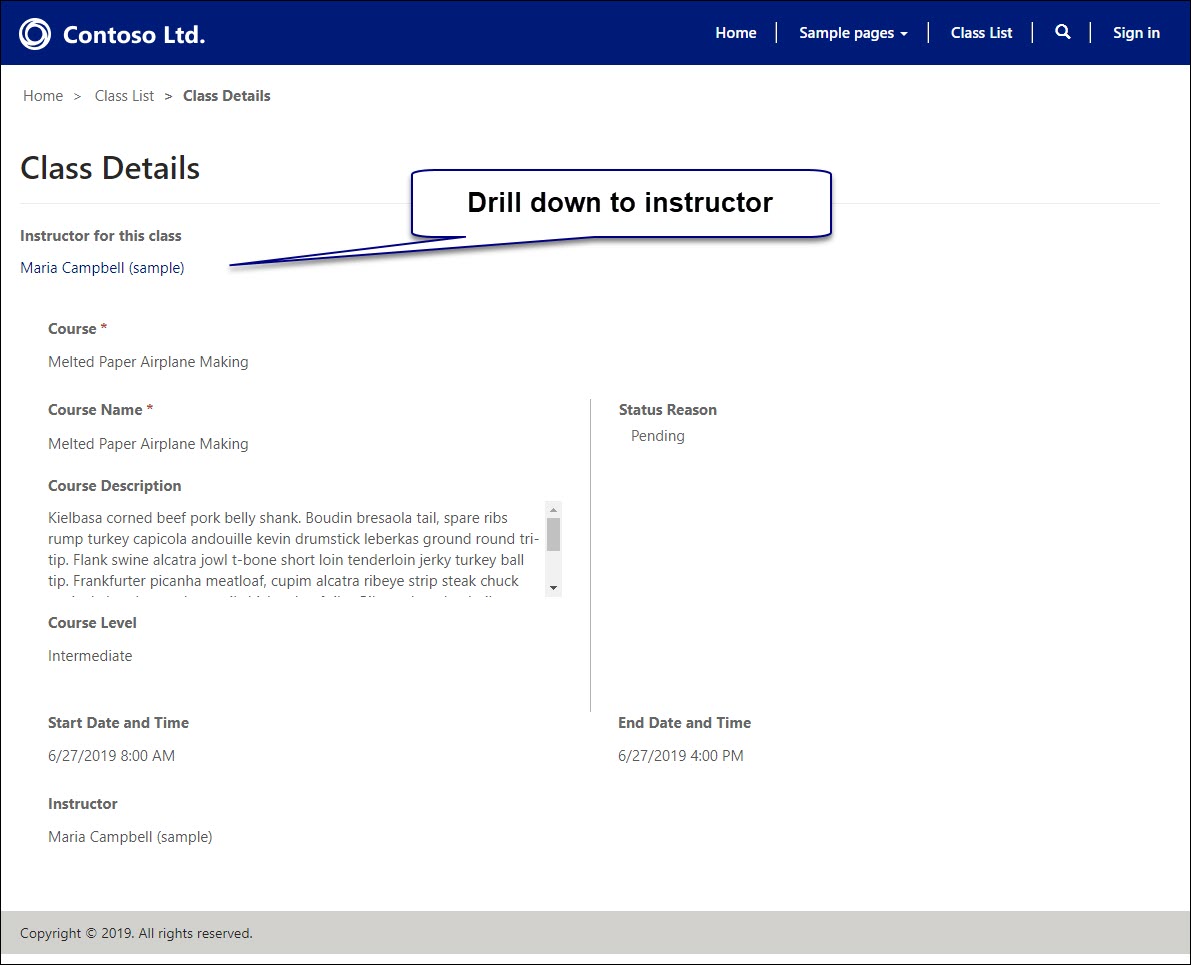
Clicking on the drill down should navigate you to the Instructor page.

Summary
The new PowerApps Portals feature will satisfy a lot of business requirements where unlicensed, external users will require access to update and interact with CDS data. Much of the existing techniques and features of Dynamics 365 Portals still apply.
Cover Photo by Matt Antonioli on Unsplash
Nick Doelman is a Business Applications MVP and is a big believer in recycling, even if it is his own content.