

Just a heads up that I will be presenting a webinar for the XRM Virtual User Group on March 28, 2017 called “Portal Developer Primer”. This session is focused for the Dynamics 365/CRM developer who needs to start getting ramped up on Portal development. It is an evolution from my session at ExtremeCRM in Newport Beach. Click here to Check it out!
Liquid Part 3
In Liquid Part 2 I demostrated how you can surface data from Dynamics 365 record on the portal. The great thing about using Liquid is that you can format and modify the layout any way you like.
In today’s post I will be show how to display a bunch of Dynamics 365 records using a custom Liquid Web Template.
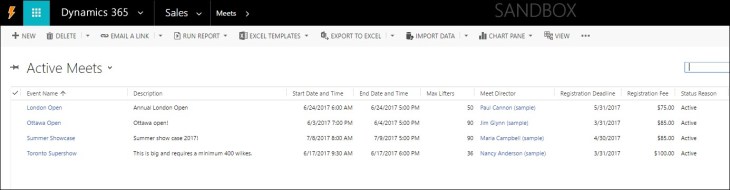
If you have done any Dynamics 365 Portal configuration, you know you can surface Dynamics 365 records by using Entity Lists. Entity Lists surface Dynamics 365 views.
While this allows you to quickly surface Dynamics 365 data, sometimes you might want to make the layout a little more elegant and user friendly than just a grid of data. A good example would be showing a catalogue of products or directory of contacts.
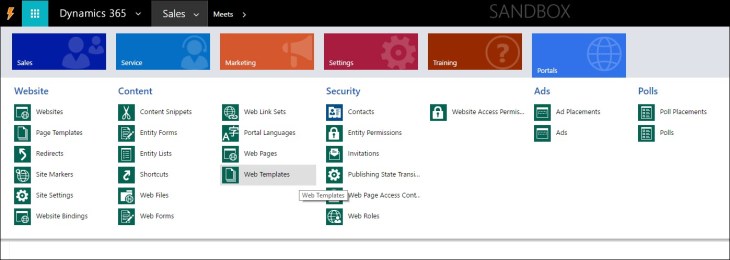
The first step is to create a Web Template.

In our code (Source) we will create a container using HTML:

The next section of code I added special Dyn365 portal specific tags to show standard parts of a typcial portal web page, the breadcrumbs (show the pages hierarchy) the page header and page copy data. This in itself makes a simple Web Template that could display static web content. The follow code would be entered in between the container class specified above:

However, we want to show some actual Dynamics 365 data. If it were just a matter of showing something like showing a standard entity list , we could add the following code to the structure:
{% if page.adx_entitylist %}
    {% include 'entity_list' key: page.adx_entitylist.id %}
 {% endif %}
This will render the standard Entity List “grid”, we want to build something a little more elegant.
In this example we will still utilize the Entity List, but will display the data in our own custom layout. The entity list will need to be defined on the web page record that will use the web template to render the content.
So I will add the following structure in the container code:

This will pull the specific Entity List that I will define when I setup the Web page.
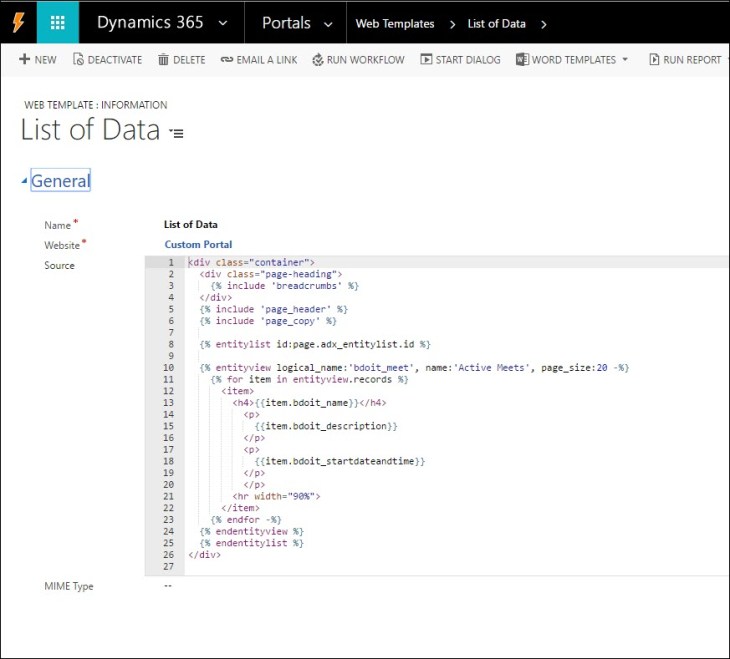
Notice that I specified entity logical name (‘bdoit_meet’), and the name of the specific view (‘Active Meets’) that I want to use, as well as the number of records per page I want to pull.
Now, lets loop through each data row and display it on our web page using the {% for in% } liquid tags.

In the code I take each item in Entity list and I am able to specify the field name (very much like how we displayed data from one record in part 2)
Notice that I began to use HTML to format the data and specify how I wanted it formatted. This is where you can get really creative.
Here is the final Web Template record source code:
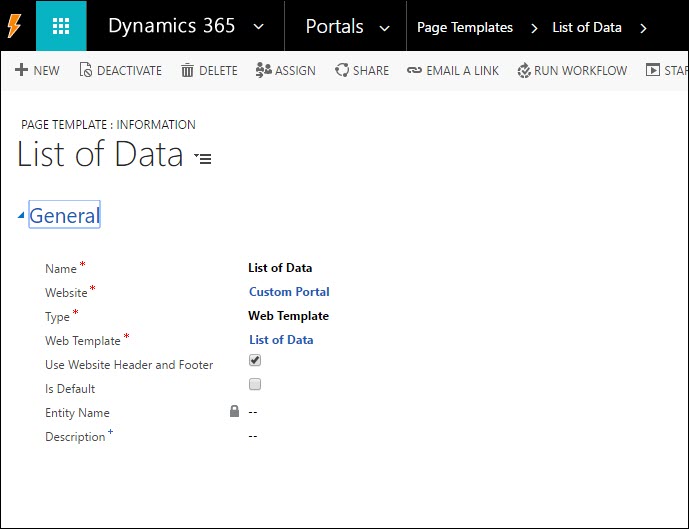
To display the data, you will need to create a correspond Page Template to point to the Web Template. This may seem redundant, but is really a throwback to the old Adxstudio structure and now the Page Template is a pointer to either a backend aspx page or a new Web Template. See my posting on Portal components to understand how all these pieces fit together.
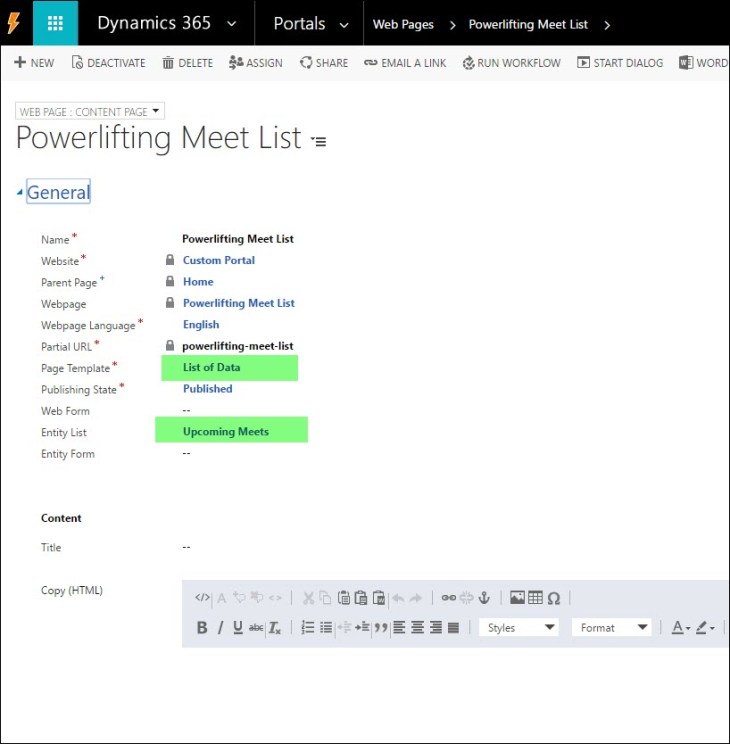
Finally we will create a Web page and put in a reference to our Entity List that we had setup earlier. We will specify the Page Template to render our data. Also create a Web link to be able to navigate to this page.
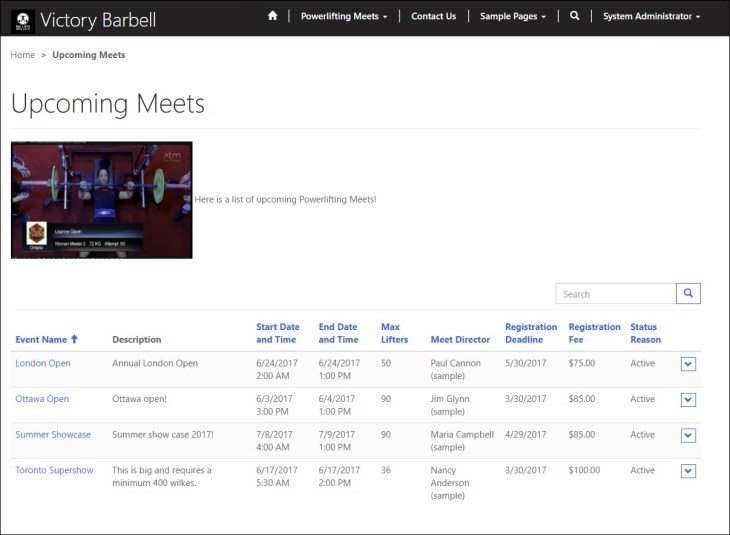
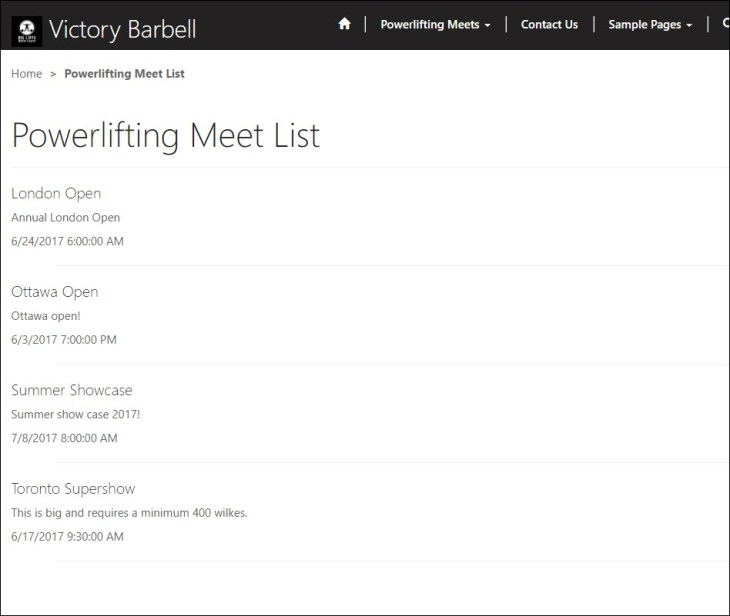
The output is as follows, note that our layout is simple, but a bit cleaner and more user friendly that a standard grid of data.
Using Liquid in a custom Web Template is a great way to surface Dynamics 365 data on a Portal form in a clean, user friendly manner. You can apply a lot more complexity (hyperlinks, images, etc) but I hope this example provides the basics to get started.
Happy Liquid Portaling!
Cheers
Nick


Reblogged this on Nishant Rana's Weblog and commented:
Liquid Markup and Entity Lists in Portal in Dynamics 365
LikeLike
if any field [description] of record value is empty/null then Can we get remaining record(s) field [description] value?
EX: record 1 has description
record 2 has no description (empty/null)
then we are not able to retrieve record 1 description value, even if we check for null
{%if item.description%}{{item.description}}
LikeLike
Hi Santhosh,
I am not sure I quite understand. If record 2 has a blank description, then the display is blank for record 2, but you still should see the descriptions in the rest of your records?
Or are you trying to manipulate the display based on the value for one particular record?
Cheers
Nick
LikeLike
Hi Santhosh
Another thought… have you checked your entity permissions on the data being displayed? If your user (even unauthenticated) doesn’t have approprite entity permissions, they will not see data. Just something else to check.
Cheers
Nick
LikeLike