

Dynamics 365 Portals have a lot of configuration features to allow you to deliver powerful portals. However, you currently don’t have access to the backend to develop your own APS.NET page templates like you could with Adxstudio Portals.
A more modern (and some would say a better way) is to create custom portal web templates using Liquid Markup Language.
Liquid was created by Shopify and written in Ruby. The power of the language is to provide a way to display dynamic data on a web page.
The ability to use Liquid in Portals was first introduced in Adxstudio v7.0.0007 and is core customization feature of the Dynamics 365 Online Portals.
With Liquid, you can create custom web page templates or used within content fields for web pages and content snippets. Liquid can also be embedded in JavaScript.
The web templates can be extended to display Portal Entity Forms and Entity Lists and can dynamically surface data directly from Dynamics 365. You don’t need Visual Studio and your Liquid creations can readily available without having to push a portal update to a web server or cloud app.
This is first in a series of posts that will provide the basic building blocks to you started using Liquid.
As is tradition, the first step in learning any language is to create a “Hello World” app.

To follow along, you will need a Dynamics 365 Online with the Portal Option enabled but the same steps will work on a Dynamics CRM 2015 or greater with Adxstudio Portals installed as well.
The first step is in Dynamics 365, navigate to Web Templates.
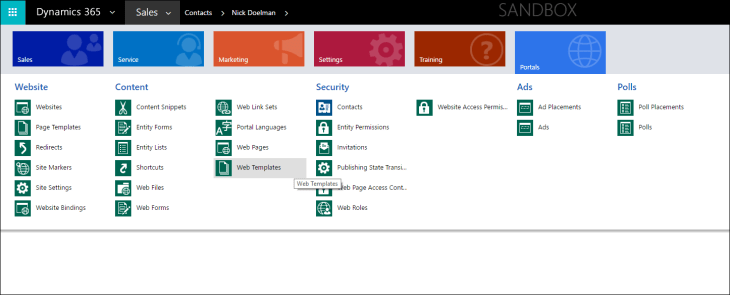
Depending on the Portal option you installed, you will see a list of list of various templates. Studying these is a great way to learn some Liquid techniques and see how the Microsoft developers have implemented various Liquid features.
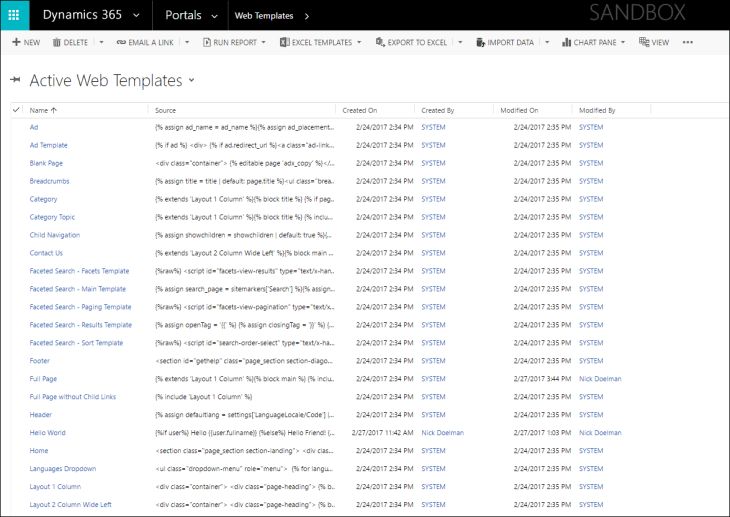
Click “New” to create a new Liquid Template.
In Liquid there are a couple different constructs to be made aware of.
Anything within the squigglies and the percents “{% %}” are Liquid “Tags” and contain the programming logic.
Anything within the double squigglies “{{ }}” are Liquid “Objects” and will represent various objects within the portal.
THIS JUST IN! The “squigglies” are called “braces” (who knew?)

In our example, we are going to use the Liquid tags to determine if a user is logged (if the “user” object contains data) and either display the user’s name (represented by a Liquid object) or just a friendly greeting.
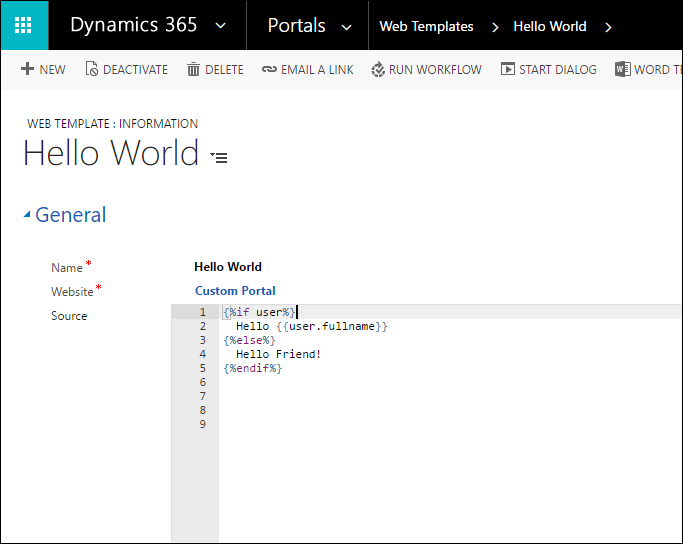
We added the content directly in Dynamics 365 but I generally would use a 3rd party editor with Liquid support (more info in later posts) to create and edit the Liquid code. Save the Web Template record.
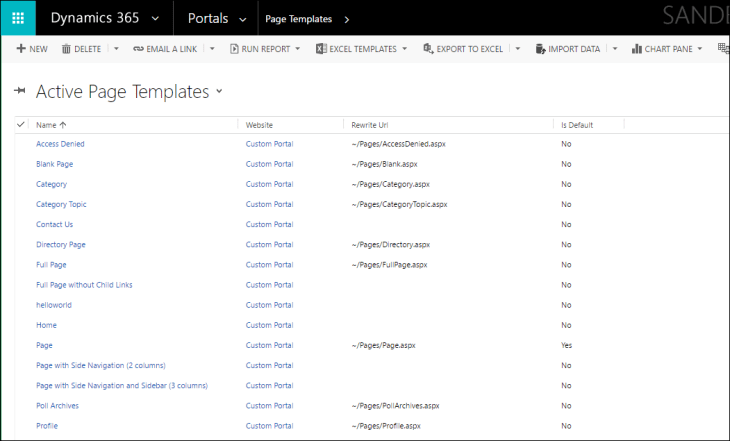
In order to use our template, we will also need to create a page template record. In the current version of the Portal, the page template record is used as a pointer to either an aspx.net page or a Web Template record.
Navigate to Portals -> Page Templates. You will notice that some page templates have a “Rewrite URL” that points to aspx pages. (Pointing to aspx pages is the “legacy” way)
Create a new Page template.
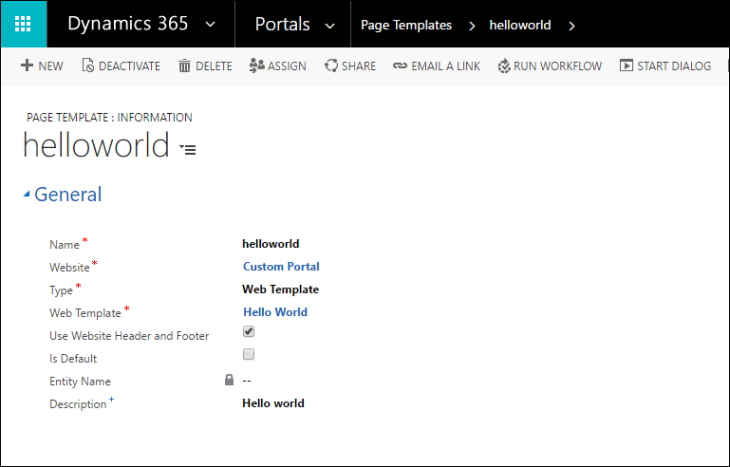
Make sure it is of type “Web Template” and provide a lookup to the Web Template you created earlier.
Once the Web Template and Page Templates records are created, you can use them for your web pages in the Portal.
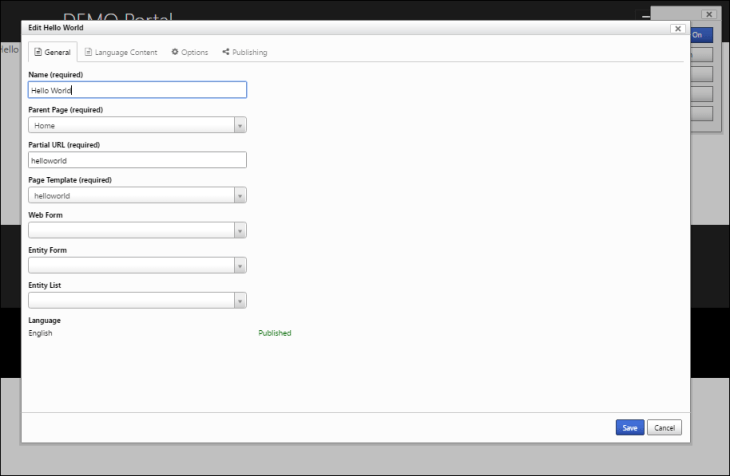
Create a web page either within Dynamics 365 or directly on the portal using the front side editing capabilities. (Make sure you create a weblink to get to your page). Choose your new Page Template.
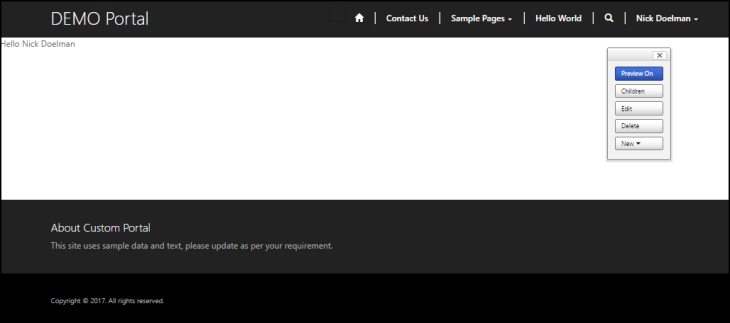
Since you are likely already logged in as user (if you added the page using front side editing) you should see the results of your Liquid template:
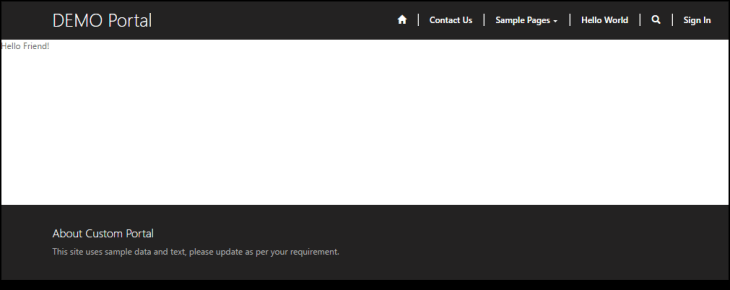
If you logout, the Liquid will run again dynamically change the results of the page.
While pretty basic, these steps give an example of what can be done using Liquid markup in the Dynamics 365 Online Portal. Part 2 will show how we can show some actual Dynamics 365 data on a Portal page using Liquid.
There is not a lot of info on the Web about using Liquid and Portals, here are some of my references:
Hope you found today’s post educational and informative!
Cheers
Nick


2 thoughts on “Liquid Markup in Dynamics 365 Portals – Part 1: “Hello World””