

The new Unified Interface provides a faster, easier way to navigate Dynamics 365 and Model-Driven PowerApps. However, there are still many Dynamics 365 implementations that are still using the “classic” web interface.
The best practice approach to convert from a classic interface to the new Unified Interface is to create a series of “role based” model-driven apps for specific workloads or job functions.
In some cases, users roles may require them to perform a series of different duties, and having to “jump” from different model-driven apps may become tedious (and defeats the purpose of an easier to use interface).
Custom Areas in the Classic Web Interface
Traditionally, when creating “xRM” applications on the classic interface, many consultants and developers would create specialized custom “Areas” on the Site Map for each specific feature or function.
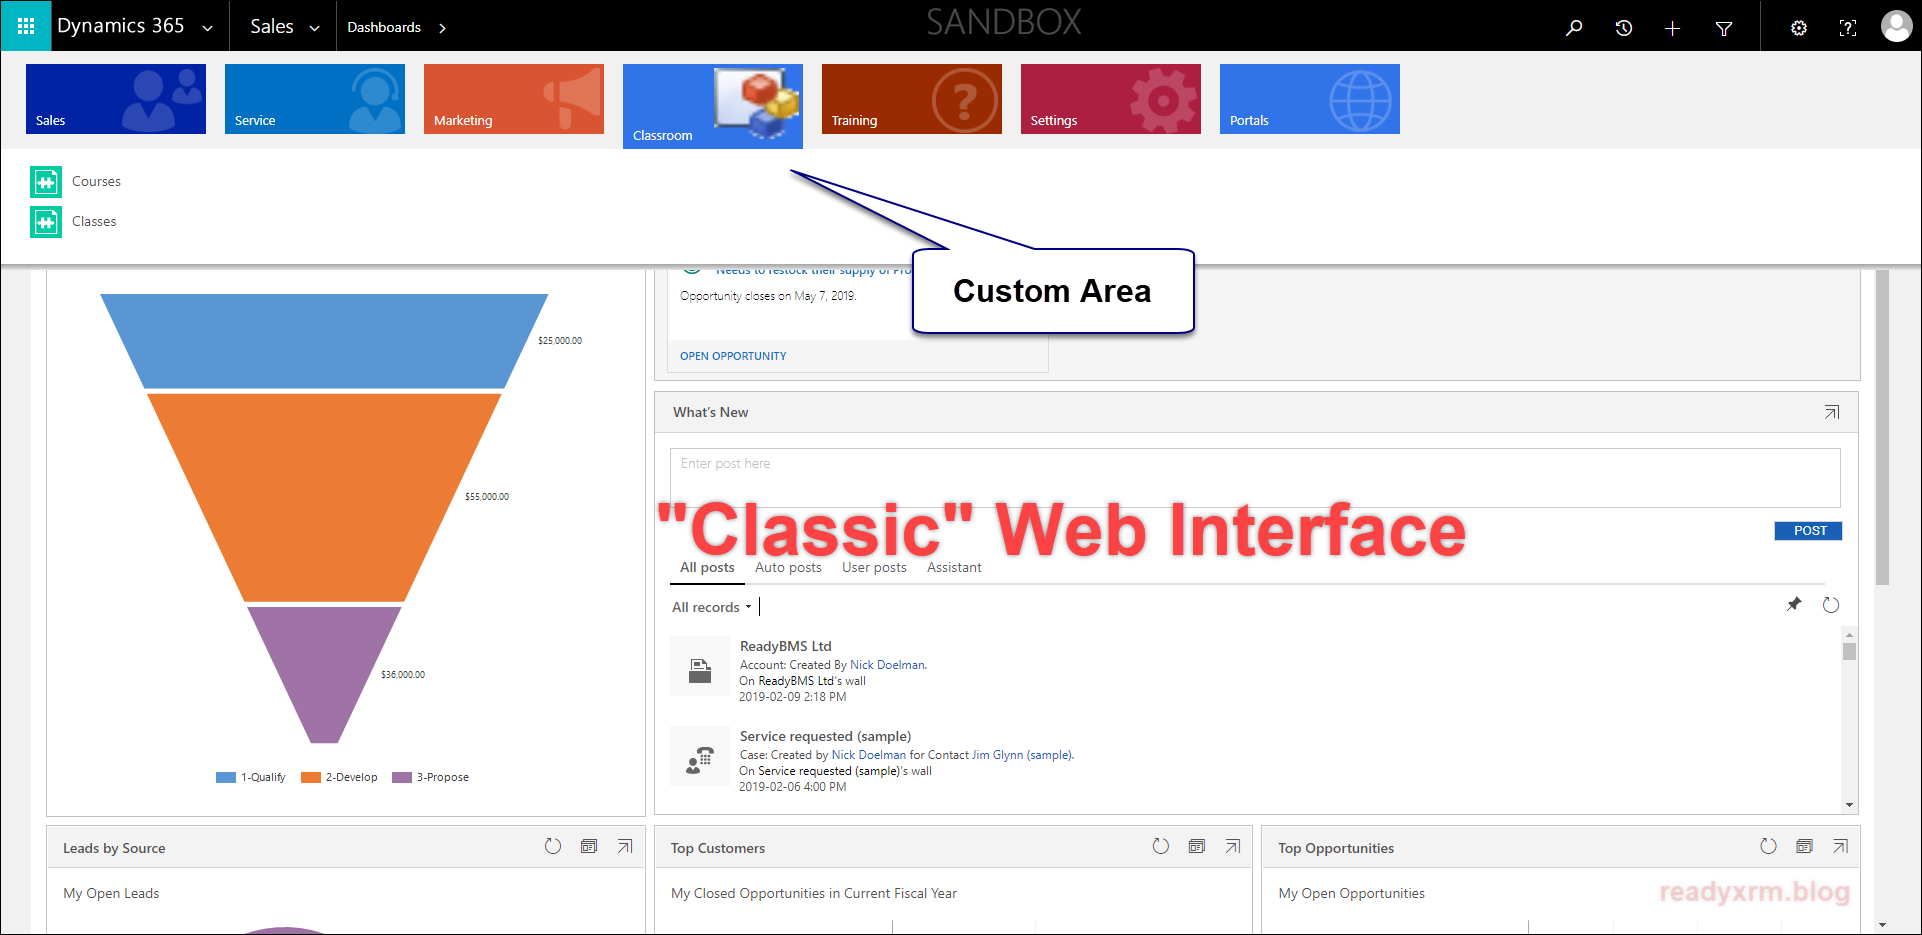
The XrmToolBox provides a easy to use interface for creating and modifying the out-of-the-box Dynamics 365 Site Map. A developer can add custom areas or hide/change existing areas.

CRM, Sales and Customer Service Hubs
Currently, any specialized Areas or changes to the Site Map are not automatically converted to the new Unified Interface. Currently, on Dynamics 365 Online, you will likely notice that there is at very least the “CRM Hub” but potentially Sales and Service Hubs as well. These are standard and will not show any custom Areas or links to custom entities.

Role-based Unified Interface Apps
The common and recommended approach is to create a “Role based” app that contains the user interface for the specific Business App/Role. This is actually a great way to remove the “noise” of other features and entities to a specific population of users that only needs to access a specific set of features.

In some cases, the “full” set of features is more desirable, especially for power users or users that need to perform a variety of roles. In this case, creating distinct model-driven apps for each role becomes tedious for users to need to “flip” between specific applications.
Convert a Complete Classic Site Map to a Complete Unified Interface App
The following are steps to very quickly convert an existing “classic” Site Map to a Unified Interface Model-driven App that will contain all the specific areas, custom entities and navigation as a customized classic web interface.
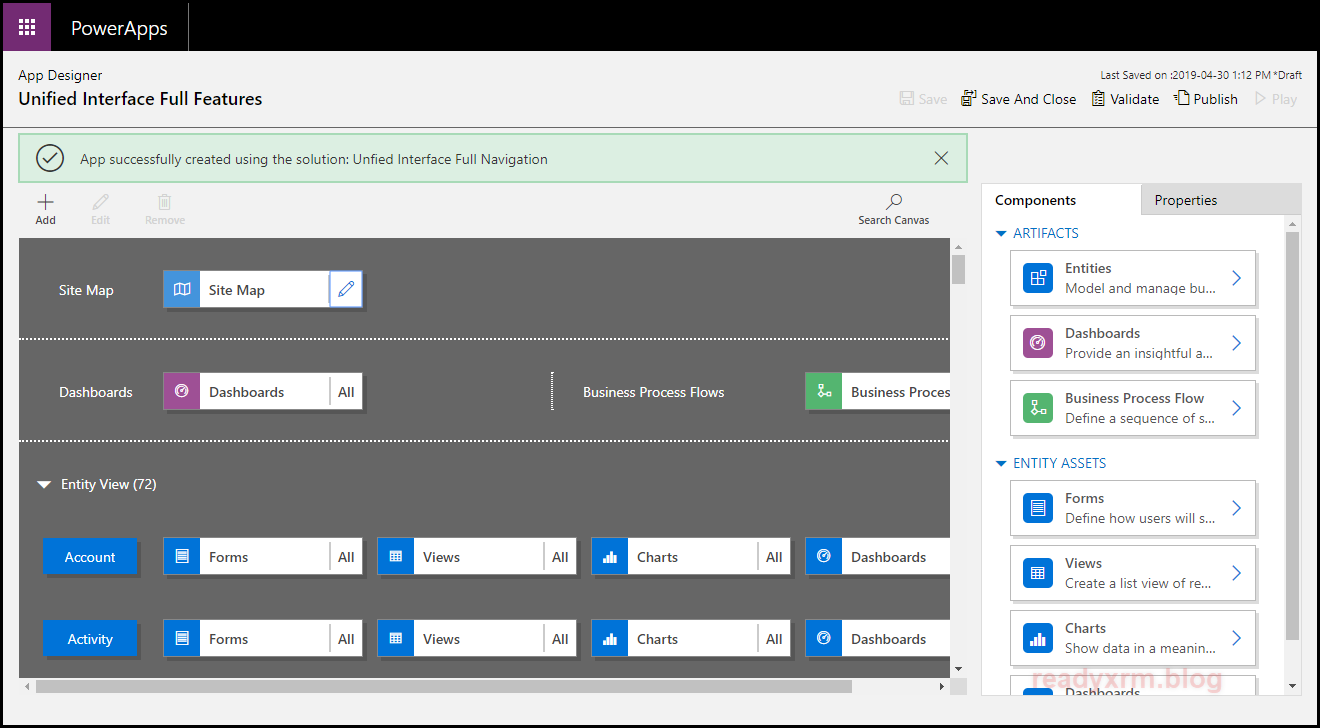
Navigate to web.powerapps.com and login with your Dynamics 365 credentials. In our example, we are using the new “Maker” experiences.
Create a new solution, and add the existing Site Map to the solution. This Site Map will contain all of the customized areas and entities.

The next step is to create a new Model-Driven App. This will be the new Unified Interface App that contains “everything”.

Give the App a name and be sure to check “Use existing solution to create the App”.

Choose the solution that was just created and also specify the Site Map.

The SiteMap essentially will be ready to go. However, it may be a good idea to clean up some specific areas, etc. When the Site Map is ready, Publish and run the App.
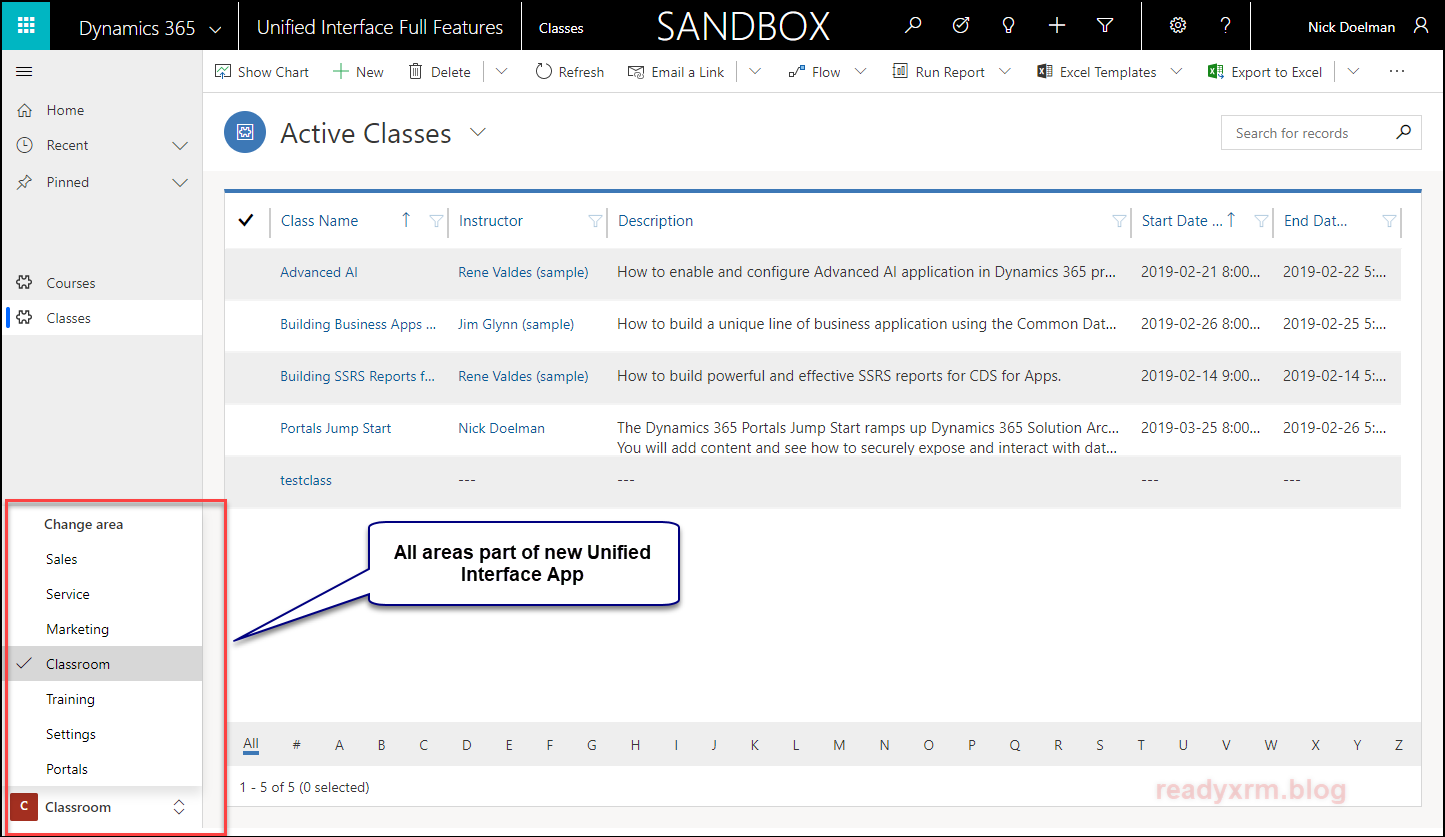
The new Unified Interface app will be a reflection of the existing “Classic” Web App, with all the Areas, custom entities, etc. This way users will not need to “flip” between specific role-based Apps.
While the App will function, you will likely want to work on cleaning up some of the Forms and Views to take better advantage of the new Unified Interface features. You will also need to replace some of the deprecated features (like Dialogs) to ensure a smooth transition.
Conclusion
The new Unified Interface is a much easier, much faster and much more intuitive way to interact with Dynamics 365 and Model-driven PowerApps. Having all the custom areas and entities in one user interface will be very helpful to users that need to access a lot of different parts of the application.
Cover Photo by Alvaro Reyes on Unsplash
Nick Doelman is a Microsoft Business Applications MVP, focusing on Portals, PowerApps and Dynamics 365 for Customer Engagement. Nick will be presentating in Toronto and Montreal on May 10th and May 11th at Dynamics 365 Saturday events.


Hey, Nick. This was very helpful, but I’m left with a question. The classic, legacy sitemap contained, in the Services tab, elements such as Administration, Business Management, etc., which themselves are not views but a collection of clickable icons which either launch some interaction or open a another view. It is true that from the new UI’s gear icon > Advanced Settings, one can return (actually open in a new tab) to the classic Settings interface. Will this be maintained going forth? Is there no way to add Business Management, Administration, etc., directly in the new UI sitemap? Thanks in advance.
LikeLike
Hi Yehoshua, Going forward, most of these particular features will likely be accessed from the Power Platform Admin Center, which you can access by going to https://aka.ms/ppac However, if you want to access these directly from your Model-driven app, my friend Megan V. Walker has an excellent post on how to add these items to your Unified Interface sitemap, check out her post here: https://meganvwalker.com/accessing-admin-areas-from-a-unified-interface-app/
LikeLike
Hi Nick, your blog is very helpful. I have a question, if I have modified the sitemap in my sandbox Unified Interface…how can I push that sitemap from sandbox to Production Unified Interface (CRM Hub)? Can I do it with a solution as in the legacy version?
LikeLike
Hi Efrain, yes, you can add the sitemap to a solution and transport it that way. Note that sitemaps belong to *apps*, so to see changes in the CRM hub, you need to modify the sitemap that belongs to the CRM Hub app. I hope this helps! Cheers, Nick
LikeLike
Hi Nick, yes, I modified the CRM hub in Sandbox, which is a copy from production. I want to send those changes in a solution to the CRM hub in production environment. Thank you so much for your help!
LikeLike