One of the great things about the new Dynamics 365 Online Portals is that you can quickly deploy a portal within the Office 365 Administrative interface.
If you are using the the legacy Adxstudio Portals, you will manually need to deploy the portal to IIS or to Azure in order for it to be accessible to the outside world.
As I mentioned in a previous post, Adxstudio v7 is only be sold on an exception basis. However, for myself and many other consultants, we still have a number of existing clients and ongoing onpremise projects on the go, so I hope some of you may find these steps useful.
The Adxstudio website has step by step instructions to deploy your portal to Azure using Visual Studio. The screen shots are slightly dated but still work fine. This is actually my preferred way to deploy a legacy portal.
“But I don’t have Visual Studio!”
No problem! You can download a community edition from here:
https://www.visualstudio.com/free-developer-offers/
“But I don’t want to install Visual Studio”
Why not?
“Because I am a functional consultant, Because IT won’t let me, because I am IT and not a developer, because my mother didn’t love me as a child, because, because…”

OK! Then. If for some reason you are adverse to using Visual Studio, here are the steps to deploy an Adxstudio Portal to Azure without Visual Studio… spoiler alert, you will need to install some kind of FTP program.
You will need the following:
- An Azure Account
- The latest Adxstudio Portal Master Portal Code (Get it from the Adxstudio web site and install it on your workstation)
- A Dynamics CRM deployment** (onprem or online) with the Adxstudio v7 solutions installed.
- An FTP program (Windows File Explorer will time out, I use SmartFTP)
*Note that there is currently an issue with the latest version of Dynamics 365 (8.2) and Adx v7, you will need to go through a few extra steps, info can he found here. (Thanks to Adoxio’s Colin Vermander for posting these steps)
**This will NOT work with Dynamics 365/CRM online with the Microsoft Online Portal solutions deployed. Or at very least not supported. I haven’t tried it, but it seems a bit like welding in a puddle of gasoline.
The Process:
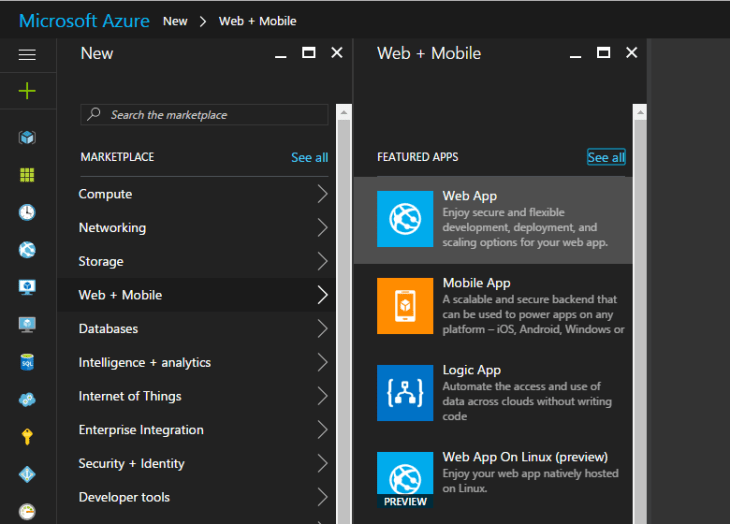
Login to Azure and choose “New -> Web + Mobile -> Web App”
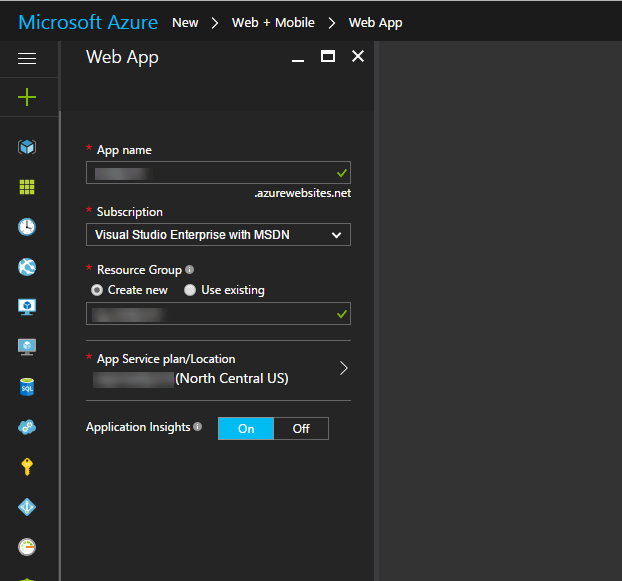
Provide a name for the App, and potentially create a new Resource Group and App Service plan. Ideally, the location of where you plan to deploy your portal should be as physically close as possible to where your Dynamics CRM/365 is located.
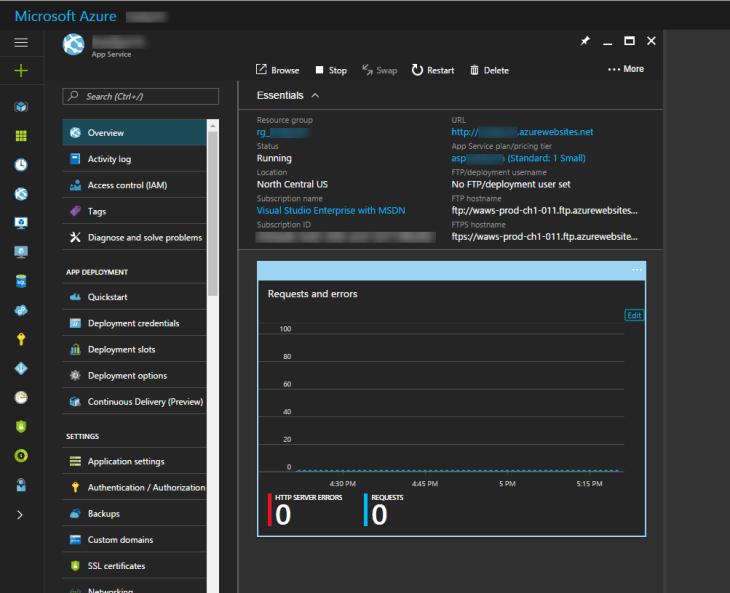
Your Azure Web App is setup.
Now all you need to do is load the Adxstudio master portal files to this site. For this job we can go old school style and load the files using FTP, just like our grandma did when she uploaded her Netscape optimized HTML file back in 1994.

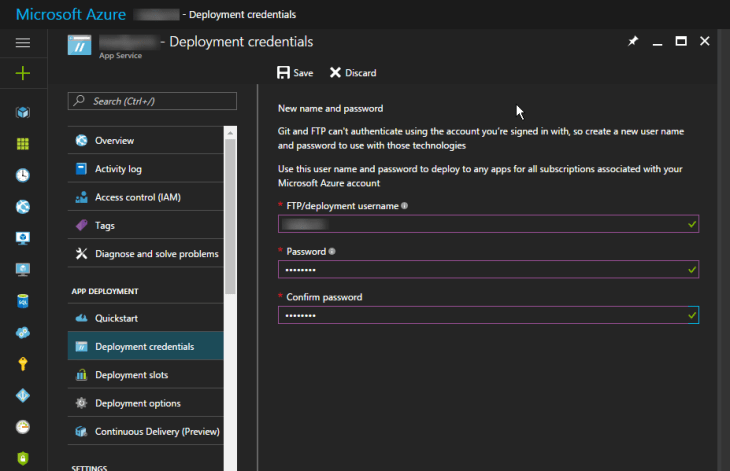
You will need to create deployment credentials on Azure to load the files via FTP. Click on Deployment credentials and give your deployment ftp user a name and password.
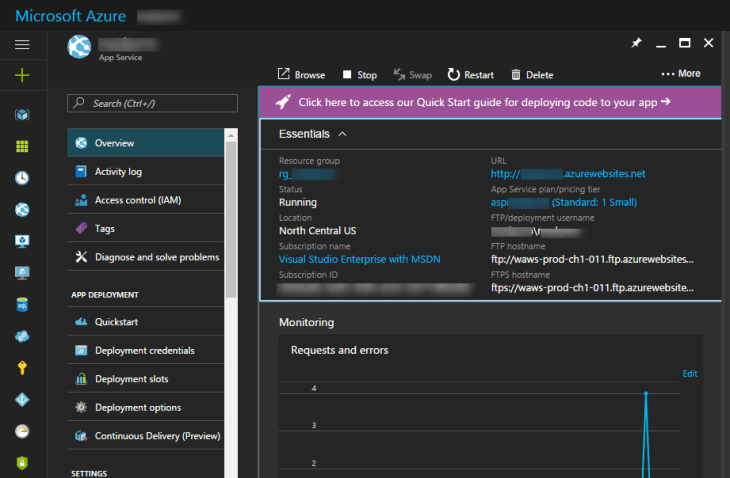
Now navigate back to your Azure Web App overview tab, note the FTP/Deployment username and also note the FTP hostname. You will need that to upload files in your FTP application.
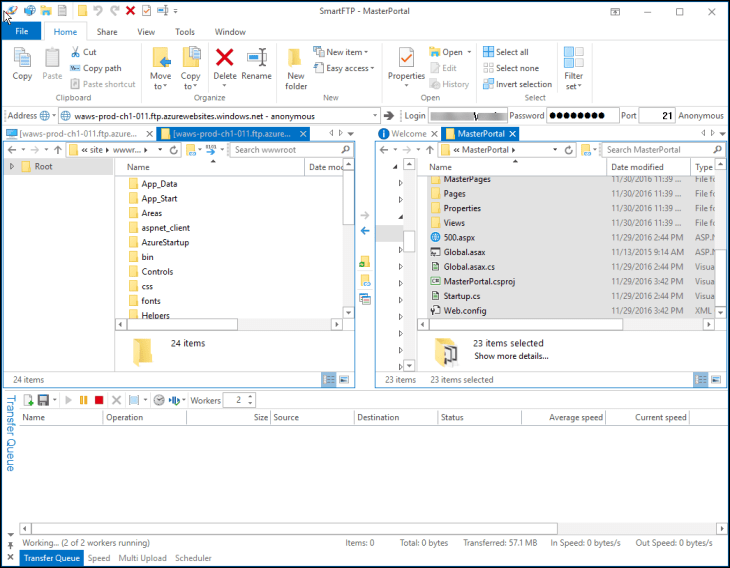
On your workstation, install and start up your favourite FTP client. For this example, I used SmartFTP. Enter in the FTP site and credentials from Azure. Upload all the Adxstudio master portal files and folders that are contained in the “MasterPortal” folder.
The default location is:
<>:\Program Files (x86)\Adxstudio\XrmPortals\7.0.00xx\Samples\MasterPortal\
The process will take a few minutes. I attempted to use regular Windows file explorer but it timed out after a few minutes, so a persistent FTP client is a better approach.
After the files have uploaded, navigate to (replace <> with your portal name)
https://<>.azurewebsites.net
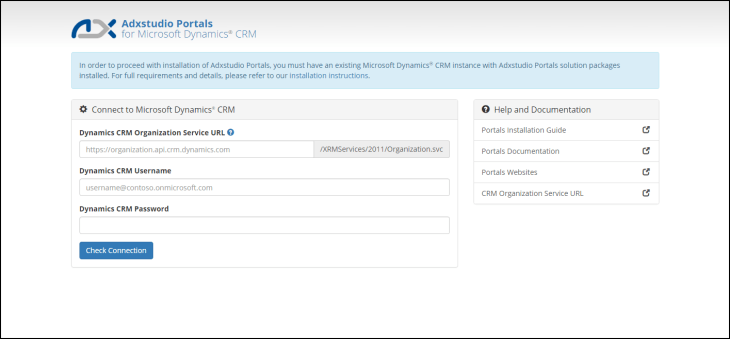
You should then see the screen to enter your Dynamics CRM/365 details.
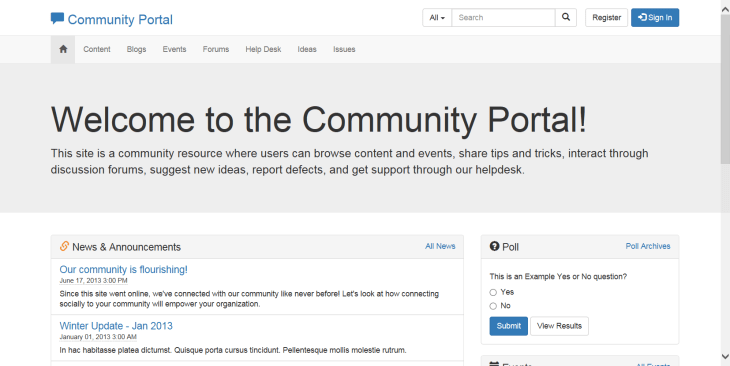
Once the details are entered, you should see your Portal come up on Azure.
I still feel that deploying a portal to Azure via Visual Studio is faster and easier, but I hope these steps are useful to those who want to avoid installing Visual Studio just for the sake of deploying an Adxstudio Portal.
Cheers!
Nick