
Summary
- There are challenges copying Dynamics 365 Portal Data from one instance to another due to the complexity of the entity structure.
- Semi-official method of using the Configuration Data Mover has potential to leave gaps and data and other pitfalls.
- The XrmToolBox Portal Data Mover has been recently updated and when used correctly is an easy-to-use method to copy portal configuration data.
Update
If you want to see this in action, check out my contribution to the CRM MVP YouTube Channel here.
Dynamics 365 Portal Configuration
Anyone that has worked with the Dynamics 365 Portal knows that the portal configuration data is stored in a series of portal-specific entities in Dynamics 365 such as websites, web pages, web templates, entity lists, entity forms, content snippets, etc. This provides a high level of configuration options when building a website that needs to expose Dynamics 365 data to external stakeholders. The downside is that the portal metadata stored as Dynamics 365 records means that it is not solution aware and it is difficult to transfer the portal configuration from one system to another, for example, from a development or test portal to a production portal.
Dynamics 365 Configuration Data Mover
The “semi-official” (although described as unsupported) way to move Portal configuration data is via the Configuration Data Migration tool. The process is outlined in this community blog posting.
There are issues and the tool is not designed specifically for Dynamics 365 Portals but rather Dynamics 365 configuration data in general (such as the unified service desk configurations).
In my experience, I have found the following issues:
- Missing relationships between records, which will cause portal errors and navigation issues.
- Duplicate Web Pages if you forget to shut off the Portal Web Page plug-ins.
- Missing web file attachments.
- Portal Data Updates are typically an “all or nothing” process, meaning you cannot just move specific web pages or other elements but must move everything. This creates a lot of overhead to update a few specific components.

All of these issues can be worked around, but they are tedious and time-consuming.
If you are using older (Adxstudio) portals, there is the Website Copy Utility or the Adxstudio ALM Toolkit. However, these tools are no longer supported and the ALM Toolkit is no longer available download, and also does not work for Dynamics 365 v9. Other options are copying/pasting or using other data migration tools.
XrmToolBox To The Rescue!
Tanguy Touzard (@TanguyTOUZARD) has recently updated his Portal Records Mover tool as part of the XrmToolBox. The tool has a few issues when it was first released, but after recent updates it now becomes an easy and viable tool for moving full Portals or even just specific Portal components.
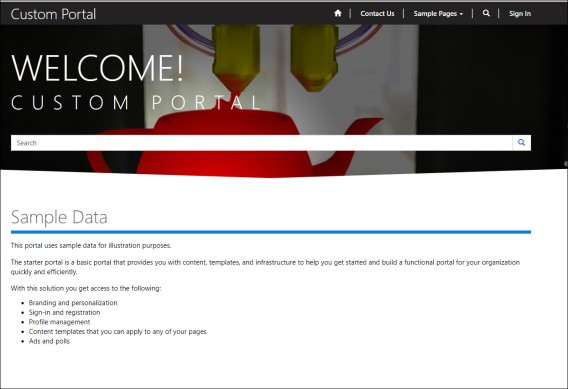
I have configured a portal on my “source” Dynamics 365 environment. This could be a separate dev instance or a completely different tenant. Note that you only get one portal license if there are at least 5 Plan 1 user licenses. For DEV/TEST portals you will need to additional subscriptions.

On my source portal, I have added a few web pages, entity lists and entity forms and some custom web links. I have also configured the authentication to be email only.
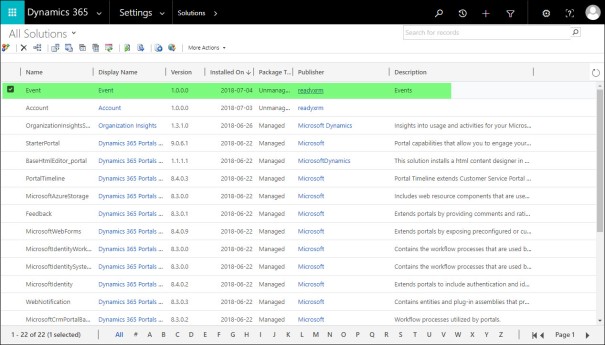
I can see the portal data in Dynamics 365 either via the “Portal” section, but with the recent v9 release, there is a new Dynamics 365 Portals App. See a good review of new Portal features are outlined by here and also information on the new inline editors here. Thanks to Nicholas Hayduk (@Engineered_Code) and Colin Vermander (@_koolin) for these great blog posts.

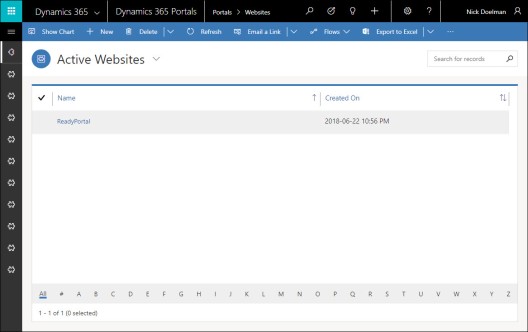
Navigating in the Portal App we will see our Custom Website.
Before you can move the portal configuration data, you will need to make sure that you deploy any of your customizations/solutions that are in any way related to the portal to the destination systems. Please read the information on the Microsoft Docs site on how to manage and move solutions.
You will also need the managed Portal solutions installed on the destination Dynamics 365 system, click here to learn how. If you should install the same “type” of Portal (e.g. Custom) as your source system, it will be overwritten. If you have multiple portals you should make sure the website GUIDs are unique. You may need another portal subscription license as there is only one license supplied per tenant with 5 plan 1 users.
You should make sure that the default, out of the box Portal is working before copying the new Portal over.
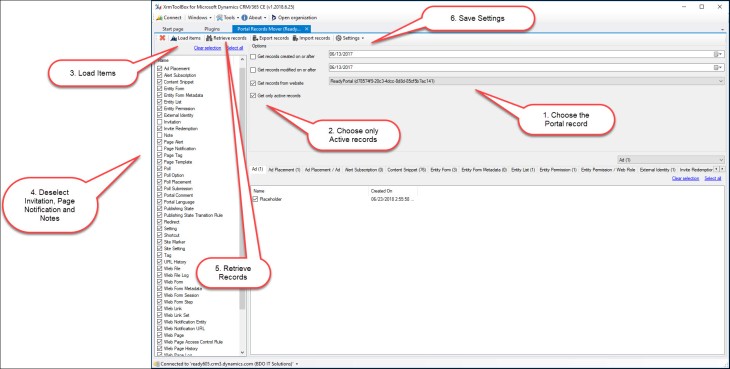
Run the XrmToolBox, make sure you have the latest build. Locate and run the Portal Records Mover plug-in.

You will want to connect to your SOURCE Dynamics 365 instance. When the tool opens, there are a lot of options and it is important to follow the order to be successful.
- Choose the Portal in source that you want to export (move)
- Choose only active records (optional, but keeps the portal data clean)
- Choose Load Items
- Deselect Invitation (causes an error and not necessary to copy) also Page Notifications (deprecated feature and seems to cause an error) and Notes (this will capture ALL notes in your Dynamics 365 system, which we don’t need). Note that by choosing Web Files, the associated attachments will come over with the data.
- Retrieve the Records
- Save Settings for the Next time.
Note that you can go into each record type and deselect particular records that you might not want to migrate. For instance, some site settings or content snippets may point to specific URLs or settings that are specific to environments. Note that the columns displayed for each record come from the “Quick Find” views in Dynamics 365 and you can modify them to show other column configurations.

Click on the “Export Records” to export the data to an XML data file.
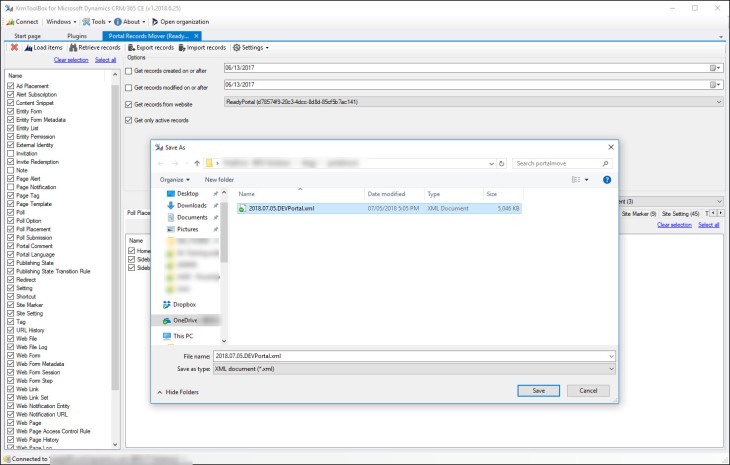
Once exported, I would recommend the file be saved to a source control system (VSTS, Git, etc).
The next step is to disconnect the Portal Records Mover from the source system and connect it to the destination system.
Once loaded, connect to the Portal Records Mover plug-in again and this time choose Import Records.

You will get a message about importing web pages and to deactivate plugin steps. THIS IS HIGHLY RECOMMENDED or you may end up with duplicate web pages as the plug-ins will create child web pages for multi-language features of the portal.

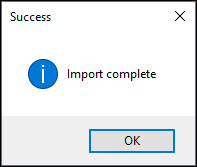
The process will begin to import the portal data.

After the records have been imported, the Portal Mover tool will create the various relationships between the records. This is a key step to ensure the portal continues to work on the destination system.

After a few moments, the process should complete. If there are any errors, you will have a log and can investigate the issues.
On the destination Dynamics 365 system, you should see your Portal.

Navigate to the Dynamics 365 Admin Center and in the Applications area, click to manage the Portal. If you have multiple Portals, you may need to select the particular portal you want to be visible.
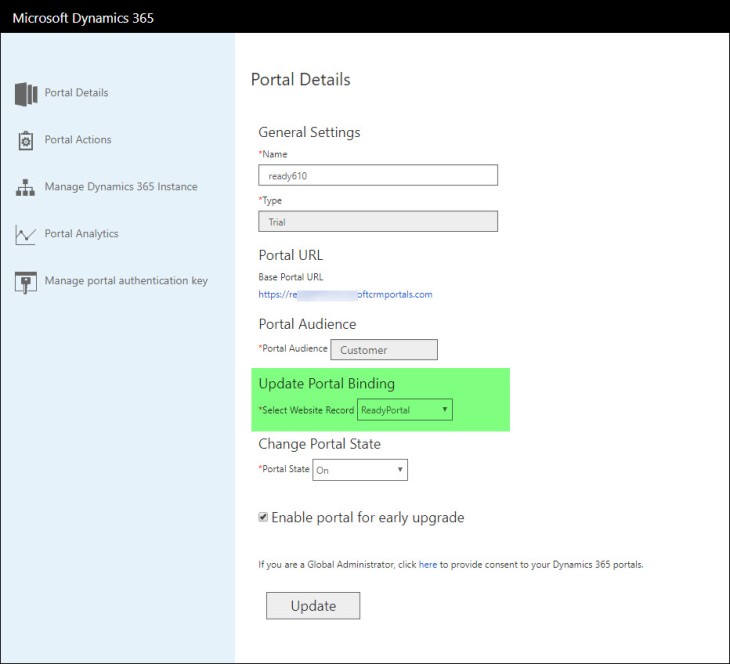
It is also a good idea to restart the Portal in order to clean out any cached items, etc.

After the Portal has restarted, navigate to the destination portal URL. Depending on the browser you used, you may still see caching issues, but the base functionality should be successfully transferred over.

After a few cache refreshes (or choosing a different browser) you should see your portal successfully migrated.

Going forward, if you create any new Portal components on the source system, you can use the Portal Records Mover to move just those new components.
Make sure you choose a date (ideally the day after you did your portal move) and the Portal Records Mover will grab just the update/new Portal records.

You can follow the same steps to update your portal.
Summary
The XrmToolBox is an ideal method for migrating and updating Portal data from a source system to a destination system (DEV to PROD). Ideally, I would like to see a few new features (a command line driven version for continuous integration) however this currently is a very easy method to migrate and update Portal configuration data on a regular basis.
UPDATE: I posted this less than an hour ago and was made aware that a command line version of this tool exists! Portal Records Mover Console by James Novak Sometimes you just need to ask for stuff!
Thanks again to Tanguy Touzard for this awesome tool!
Nick Doelman is Microsoft Business Applications MVP and has been recently awarded for the second time. Nick will be presenting at D365UG Summit in Phoenix in October.


Hi Nick
Excellent notes on the XrmToolbox plugin. Thanks for posting the link to the console app on Github. The UI version saved us loads of time so I hope the console app can help with automated builds and deployments.
I posted some notes about it’s usage and the deltas from the UI version here: https://futurezconsulting.com/2018/07/02/xrmtoolbox-portal-records-mover-console/
Any feedback or bug reports are always appreciated!
Jim
LikeLike
Thanks Jim for the info!
LikeLike
Great post 🙂
I made a quite large migration from sandbox to production using XrmToolBox.
I followed your “guide” and it worked flawlessly.
I have used the “Configuration Data Migration tool” earlier on the same project, and must say that the Portal Records Mover will be the preferred tool for future migrations – much easier to use and not so complex.
/Jacob
LikeLiked by 1 person
Thanks Jacob. The real credit needs to go to Tanguy Touzard for building this tool. It has been a real lifesaver on Portal projects!
LikeLike
Thank you so much! This saved me a ton of time and effort!
LikeLike
Thanks a lot Nick for this great post.
But I have a question. Is it possible to use the “Portal Records Mover” to duplicate a Portal Website in the same environment ? to use one as a Dev and the other as a UAT for example ?
If not, is there any other tool that can do such operation ?
Thanks in advance.
LikeLike
No, the issue is that the portal starter templates are provisioned with a common set of data, using the same GUIDs, so you cannot “clone” a portal on the same environment using those tools (you would have GUID conflicts). You would be better off the have a separate environment for DEV and UAT. I do know that some folks will run some custom scripts on the exported data (either from XrmToolBox or configuration data migration tool) and change the GUIDs for all the records and re-import as a way to have a non-microsoft template portal, but you still need to have some other portal provisioned in order to get the azure web application to point to. That would only be available on CDS environments with Dynamics 365 enabled. Vanilla CDS only allows one portal per environment.
LikeLike
Thanks a lot for your reply.
We have a CDS environment with Dynamics 365, we have 2 portal addons, and we want to duplicate our Website (already linked to the 1st addon), and make some modifications on it (adding some functionalities and new style), and after that configure the 2nd addon with 2nd Website. Like that we will have 2 published portals (old and new one) published in the same time.
LikeLike
THANK YOU! You don’t know how refreshing it was to follow your instructions and have it actually work with no issues!!!!
LikeLike
Glad to hear it! I use that tool often and it just works! (touch wood)
LikeLike
Hey Nick this blog is really helpful have two portals with two different environments. I am trying to merge in target environment which is UAT.
When I upload one portal its successfully get uploaded. when I upload second portal its website records get override with first portals website. I have checked and find that they have same guid that’s why it get override with each other. Do you have any solution for this? or have any idea why this is happening?
LikeLike
When you provision a power apps portal from one of the 7 starter templates (blank, customer service, customer, community, partner, employee, field service) each one will have the same website record GUID. E.g. any “blank” portal created around the world will always have the GUID f46b70cc-580b-4f1a-87c3-41deb48eb90d. So if you have 2 separate DEV environments, each with the blank portal provisioned, if you import each of these 2 environments into 1 target environment, it will consider it one portal and one will overwrite the other because the GUIDs match. (Even if you rename the website record) They way around this is to provision a portal, export the data (either from Portal records mover, Data Migration Tool, Portal CLI, etc.) and then run a (Powershell?) script to replace the GUIDs in the exported portal records (while maintaining relationships, that is the tricky part), and then reimport, this should create a separate set of portal data (and portal). You can then use the Portal Admin to repoint to this new portal. Note that the only Dynamics 365-enabled Dataverse instances allow for more than one portal. I don’t have guidance or steps to do this (so backup, backup, backup) but that essentially is why you are over-writing.
LikeLike
Hi Nick, When I migrate my portal using the tool, all the portal configuration migrates properly, but I’m seeing issue in the UI. All navigations have been wiped out. Any idea what I’m missing here?
My portal is a custom portal, the out of the box portal has a home button, name of the user logged in with the button to navigate to the profile page, etc. , they’re all gone
LikeLike
The menu items/navigation is managed using the WebLinks and WebLinks Sets tables, Take a look at those records, that might be where the issue exists.
LikeLike